Ingredients
– 1 pound boneless, skinless chicken thighs, pounded to ½ inch thickness
– 2 large eggs
– 3 tablespoons all-purpose flour
– ½ teaspoon salt
– ½ teaspoon black pepper
– 2 cups panko breadcrumbs
– Oil for frying
– Nori sheets cut into thirds
– 6 cups sushi rice, cooked
– Tonkatsu sauce for spreading
Instructions
1-First Step: Prepare the Chicken Start by pounding the chicken thighs to an even ½ inch thickness using a meat mallet or rolling pin. This ensures the meat cooks uniformly and stays juicy, which is key for a great chicken katsu musubi. Once pounded, mix 2 large eggs, 3 tablespoons all-purpose flour, ½ teaspoon salt, and ½ teaspoon black pepper in a shallow dish to form the batter, adjusting with water if it’s too thick. For the best fried chicken, coat each piece in the batter, letting excess drip off, then dredge in 2 cups panko breadcrumbs for that irresistible crunch.
2-Second Step: Fry the Chicken Heat oil in a pan to 350°F and fry the breaded chicken for 4 to 6 minutes until it reaches an internal temperature of 165°F. Flip halfway through for even browning, and don’t overcrowd the pan. After frying, remove the chicken and let it cool on a wire rack to keep it crispy, a technique that works well for busy parents making chicken katsu musubi in batches. This step is where the magic happens, turning simple ingredients into a flavorful main component. For health tips on frying, see this external resource on chicken benefits.
3-Third Step: Cook the Sushi Rice While the chicken rests, cook 6 cups of sushi rice according to package instructions, then season it while warm for the best sticking power. This rice forms the base of your chicken katsu musubi, holding everything together without needing extra fuss. Once done, let it cool slightly but keep it moist for easy shaping, which is ideal for students or working professionals prepping ahead.
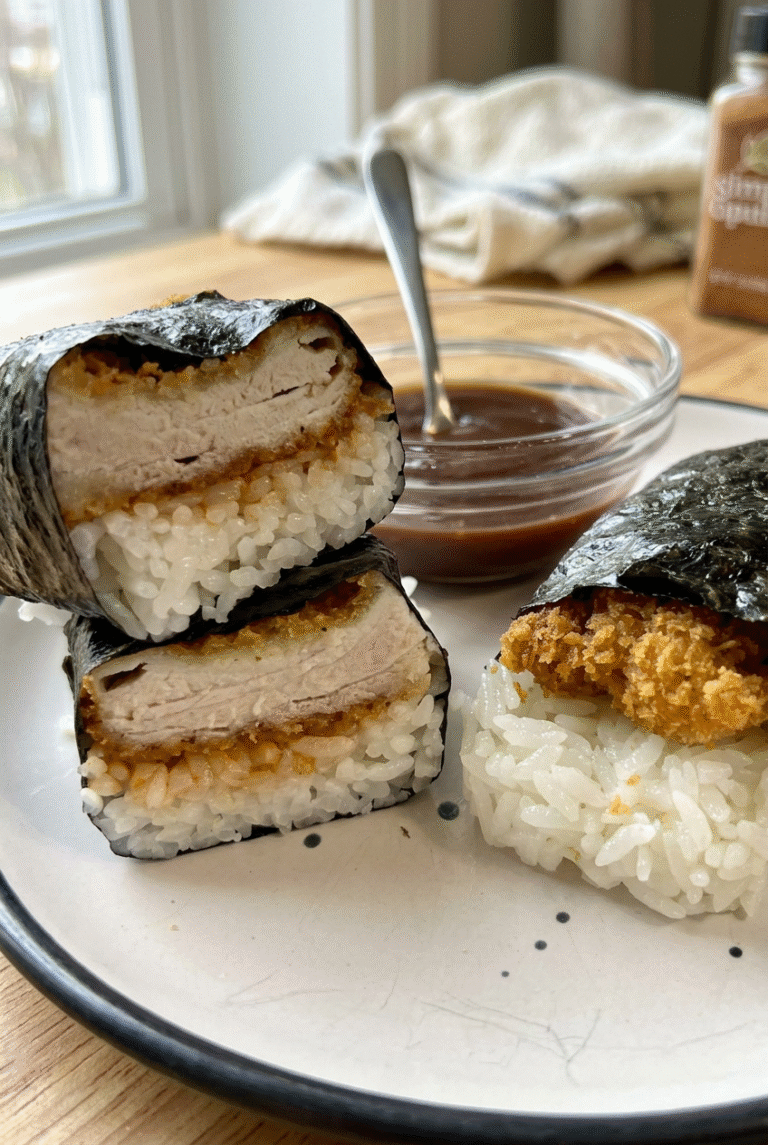
4-Fourth Step: Assemble the Musubi Lay a nori sheet strip on a clean surface and moisten a musubi mold or empty tin can to prevent sticking. Pack about ½ cup of sushi rice firmly into the mold placed on the nori, then carefully remove it to form a rectangle. Spread a small amount of tonkatsu sauce on the rice, add a piece of fried chicken on top, and wrap the nori tightly around it, sealing the edges with a little water. This assembly step is straightforward and adaptable; for dietary needs, consider using gluten-free nori if needed.
5-Fifth Step: Final Touches and Serving Once wrapped, let the musubi sit for a minute to set, then slice if desired for easier eating. This chicken katsu musubi is best served fresh to maintain that crispy texture, making it a great lunch option for travelers or seniors. Serve it with extras like pickled veggies for added flavor, and enjoy the balance of textures and tastes in every bite. As a food enthusiast tip, experimenting with portion sizes can make it fit various preferences for this katsu musubi recipe.
Last Step:
Please leave a rating and comment letting us know how you liked this recipe! This helps our business to thrive and continue providing free, high-quality recipes for you.Notes
🍗 Opt for chicken thighs over breasts for juicier, more flavorful results that stay moist during frying and assembly.
🥄 Pounding the chicken to even thickness promotes uniform cooking and tenderness, preventing dry or undercooked spots.
💧 Moisten the musubi mold or can lightly before each use to ensure the sticky rice releases cleanly without breaking the shape.
- Prep Time: 30 minutes
- Cook Time: 15 minutes
- Category: Main Dish
- Method: Frying
- Cuisine: Japanese-Hawaiian
- Diet: High-Protein
Nutrition
- Serving Size: 1 musubi
- Calories: 559 kcal
- Sugar: 2g
- Sodium: 656mg
- Fat: 9g
- Saturated Fat: 2g
- Unsaturated Fat: 5g
- Trans Fat: 0.03g
- Carbohydrates: 81g
- Fiber: 4g
- Protein: 34g
- Cholesterol: 190mg