Why You’ll Love This Chicken Katsu Musubi
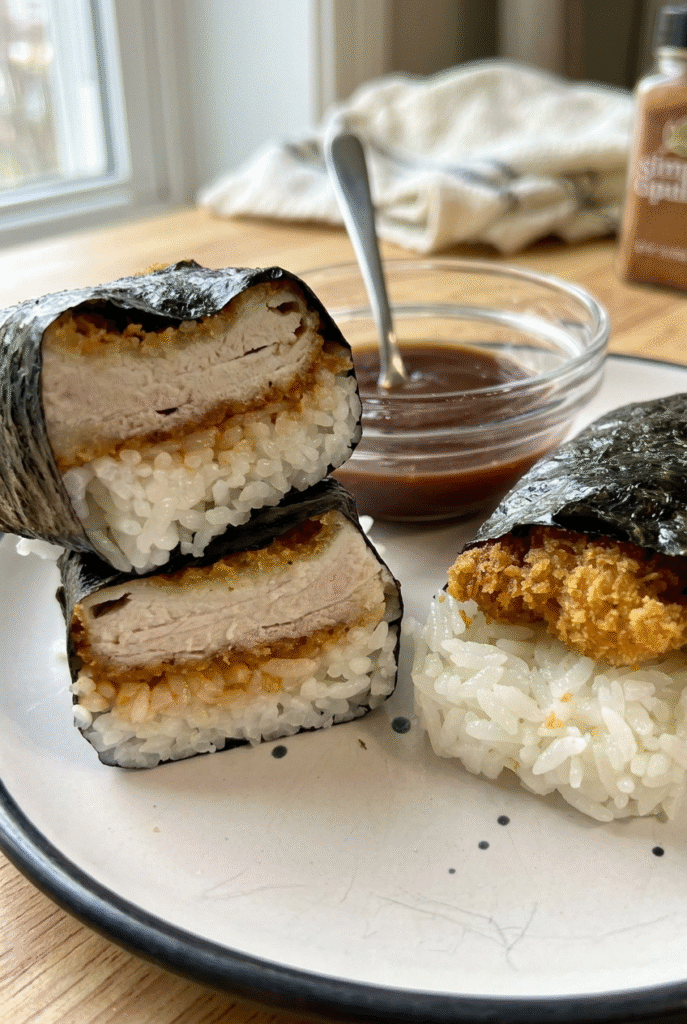
Chicken Katsu Musubi is a fantastic dish that combines crispy fried chicken with sticky sushi rice, all wrapped in nori for a portable treat. If you’re a home cook looking for something simple yet delicious, this recipe fits the bill with its ease and flavor. Let’s dive into why this chicken katsu musubi recipe will become a staple in your kitchen.
- It offers a perfect mix of textures, from the crunchy panko-coated chicken to the soft rice, making every bite exciting and satisfying.
- This dish comes together quickly, ideal for busy days when you need a meal that’s ready in under an hour.
- It’s versatile for various diets, allowing you to swap ingredients without losing the core katsu musubi charm.
Ease of Preparation
One of the best things about this chicken katsu musubi is how straightforward it is to make. With a prep time of just 30 minutes and cook time of 15 minutes, totaling 45 minutes, even beginners can whip it up without stress. The steps involve pounding the chicken, coating it in batter, frying it, and assembling with rice and nori, all of which use common kitchen tools like a meat mallet or an empty tin can as a mold. This simplicity makes chicken katsu musubi a go-to option for busy parents and students who want a tasty meal fast, without needing advanced skills.
Health Benefits
This recipe provides a balanced nutritional profile that appeals to diet-conscious individuals. Each serving packs 559 calories, with 34 grams of protein to support muscle health, and only 9 grams of fat, including healthy fats like polyunsaturated and monounsaturated options. The fiber from the rice and veggies adds up to 4 grams per serving, aiding digestion, while vitamins like A and iron contribute to overall wellness. As a crispy fried delight, it’s a smarter choice for those watching their sodium at 656 mg per serving, especially when paired with fresh ingredients.
Versatility
Chicken katsu musubi adapts easily to different needs, making it great for food enthusiasts and those with specific diets. You can tweak it for various preferences, like using gluten-free panko or plant-based substitutes for the chicken. This flexibility means it’s suitable for travelers or newlyweds exploring new flavors, and it works as a lunch option that stores well for the next day. Whether you’re a working professional grabbing a quick bite or a party host turning it into appetizers, this katsu musubi recipe shines in any scenario.
Distinctive Flavor
What sets chicken katsu musubi apart is its unique blend of savory tonkatsu sauce with juicy fried chicken on sticky rice, all wrapped in seaweed for a burst of umami. The panko breadcrumbs create a crispy exterior that contrasts with the tender chicken thighs, pounded to even thickness for optimal taste. This combination, inspired by Hawaiian snacks, offers a fresh twist on fried chicken dishes, appealing to baking enthusiasts and seniors seeking comforting meals. It’s best enjoyed températures fresh to keep that crispy texture, making it a standout in your recipe collection.
Jump to:
- Why You’ll Love This Chicken Katsu Musubi
- Ease of Preparation
- Health Benefits
- Versatility
- Distinctive Flavor
- Essential Ingredients for Chicken Katsu Musubi
- Main Ingredients
- Special Dietary Options
- How to Prepare the Perfect Chicken Katsu Musubi: Step-by-Step Guide
- First Step: Prepare the Chicken
- Second Step: Fry the Chicken
- Third Step: Cook the Sushi Rice
- Fourth Step: Assemble the Musubi
- Fifth Step: Final Touches and Serving
- Dietary Substitutions to Customize Your Chicken Katsu Musubi
- Protein and Main Component Alternatives
- Vegetable, Sauce, and Seasoning Modifications
- Mastering Chicken Katsu Musubi: Advanced Tips and Variations
- How to Store Chicken Katsu Musubi: Best Practices
- FAQs: Frequently Asked Questions About Chicken Katsu Musubi
- What is chicken katsu musubi?
- What kind of chicken and rice is best for chicken katsu musubi?
- How do you shape rice for chicken katsu musubi without a mold?
- How long and at what temperature do you fry chicken for chicken katsu musubi?
- What sauce goes best with chicken katsu musubi and how do you serve it?
- Chicken Katsu Musubi
- Ingredients
- Instructions
- Last Step:
- Notes
- Nutrition
- Did you make this recipe?
Essential Ingredients for Chicken Katsu Musubi
To make this chicken katsu musubi recipe, you’ll need a few key items that come together to create that perfect crispy fried chicken on sticky rice. Each ingredient plays a specific role, ensuring the dish is flavorful and textured just right. Let’s break down the list with precise measurements and brief explanations to help you shop and prepare with ease.
Main Ingredients
- 1 pound boneless, skinless chicken thighs, pounded to ½ inch thickness – This provides the juicy base for the katsu, staying moist during frying and absorbing flavors well.
- 2 large eggs – They help bind the batter, creating a smooth coating that adheres to the chicken for even frying.
- 3 tablespoons all-purpose flour – Adds structure to the batter, making it slightly thinner than pancake mix for a light crunch.
- ½ teaspoon salt – Enhances the overall taste of the chicken and batter, balancing the flavors without overpowering.
- ½ teaspoon black pepper – Brings a subtle spice to the mix, complementing the crispy exterior of the fried chicken.
- 2 cups panko breadcrumbs – These create the signature crunch, offering a lighter texture than regular breadcrumbs for that katsu musubi feel.
- Oil for frying – Use enough to submerge the chicken partially, like vegetable oil, for golden results at 350°F.
- Nori sheets cut into thirds – Wraps the rice and chicken, adding a seaweed flavor and helping hold the musubi shape.
- 6 cups sushi rice, cooked – Provides the sticky base that’s essential for forming the musubi without it falling apart.
- Tonkatsu sauce for spreading – Adds a sweet-savory finish, drizzled on top to tie all the flavors together in this chicken katsu musubi.
Special Dietary Options
For those with dietary restrictions, here are some easy swaps to customize your chicken katsu musubi:
- Vegan: Replace chicken thighs with tofu or seitan, pounded to ½ inch thickness, and use plant-based egg substitutes like flaxseed mixture for the batter to keep it crispy.
- Gluten-free: Swap all-purpose flour and panko with gluten-free versions, ensuring the breadcrumbs are made from rice or another gluten-free base to maintain the texture.
- Low-calorie: Opt for air-frying the chicken instead of deep-frying to reduce oil use, and measure portions to about ½ cup rice per musubi for lower carb intake.
As you gather these ingredients, remember that fresh choices can enhance your chicken katsu musubi experience. For more on healthy ingredient swaps, check out our guide to healthy cooking tips on the blog.
How to Prepare the Perfect Chicken Katsu Musubi: Step-by-Step Guide
Creating the ultimate chicken katsu musubi involves a few simple steps that lead to a crispy, delicious result. This guide walks you through each part, from prepping the ingredients to assembling the final dish. With a total time of 45 minutes, it’s perfect for home cooks wanting a fried chicken treat with a twist.
First Step: Prepare the Chicken
Start by pounding the chicken thighs to an even ½ inch thickness using a meat mallet or rolling pin. This ensures the meat cooks uniformly and stays juicy, which is key for a great chicken katsu musubi. Once pounded, mix 2 large eggs, 3 tablespoons all-purpose flour, ½ teaspoon salt, and ½ teaspoon black pepper in a shallow dish to form the batter, adjusting with water if it’s too thick. For the best fried chicken, coat each piece in the batter, letting excess drip off, then dredge in 2 cups panko breadcrumbs for that irresistible crunch.
Second Step: Fry the Chicken
Heat oil in a pan to 350°F and fry the breaded chicken for 4 to 6 minutes until it reaches an internal temperature of 165°F. Flip halfway through for even browning, and don’t overcrowd the pan. After frying, remove the chicken and let it cool on a wire rack to keep it crispy, a technique that works well for busy parents making chicken katsu musubi in batches. This step is where the magic happens, turning simple ingredients into a flavorful main component. For health tips on frying, see this external resource on chicken benefits.
Third Step: Cook the Sushi Rice
While the chicken rests, cook 6 cups of sushi rice according to package instructions, then season it while warm for the best sticking power. This rice forms the base of your chicken katsu musubi, holding everything together without needing extra fuss. Once done, let it cool slightly but keep it moist for easy shaping, which is ideal for students or working professionals prepping ahead.
Fourth Step: Assemble the Musubi
Lay a nori sheet strip on a clean surface and moisten a musubi mold or empty tin can to prevent sticking. Pack about ½ cup of sushi rice firmly into the mold placed on the nori, then carefully remove it to form a rectangle. Spread a small amount of tonkatsu sauce on the rice, add a piece of fried chicken on top, and wrap the nori tightly around it, sealing the edges with a little water. This assembly step is straightforward and adaptable; for dietary needs, consider using gluten-free nori if needed.
Fifth Step: Final Touches and Serving
Once wrapped, let the musubi sit for a minute to set, then slice if desired for easier eating. This chicken katsu musubi is best served fresh to maintain that crispy texture, making it a great lunch option for travelers or seniors. Serve it with extras like pickled veggies for added flavor, and enjoy the balance of textures and tastes in every bite. As a food enthusiast tip, experimenting with portion sizes can make it fit various preferences for this katsu musubi recipe.
To elevate your meal pairing, check out our mojito recipe that complements fried dishes nicely.
| Nutrient | Amount per Serving |
|---|---|
| Calories | 559 kcal |
| Carbohydrates | 81 g |
| Protein | 34 g |
| Fat | 9 g |

Dietary Substitutions to Customize Your Chicken Katsu Musubi
Protein and Main Component Alternatives
If you’re adapting this chicken katsu musubi for different tastes, try swapping chicken thighs with turkey or pork for a similar juicy texture. For vegetarians, tofu works great as a plant-based option, just pound it to ½ inch thickness and follow the same batter process. These changes keep the crispy fried element while catering to dietary needs, making it easy for busy parents to adjust on the fly.
Vegetable, Sauce, and Seasoning Modifications
Swap nori for lettuce wraps if you prefer a fresher take on chicken katsu musubi, or use a different sauce like soy glaze for varied flavors. For seasonings, reduce salt to ¼ teaspoon for low-sodium diets and add herbs for extra taste. These tweaks ensure your katsu musubi remains versatile across seasons and restrictions, appealing to food enthusiasts experimenting at home.
Mastering Chicken Katsu Musubi: Advanced Tips and Variations
To take your chicken katsu musubi to the next level, try these pro cooking techniques like double-frying for extra crispness. For flavor variations, add garlic to the batter or use spicy panko for a kick. Presentation tips include garnishing with sesame seeds for visual appeal, and make-ahead options involve prepping rice ahead to save time. These strategies help busy schedules while keeping that fresh crispy texture.
How to Store Chicken Katsu Musubi: Best Practices
Proper storage keeps your chicken katsu musubi tasty for later. For refrigeration, wrap tightly in plastic and store for up to 2 days to maintain freshness. Freezing works by placing portions in airtight bags for up to a month, thawing in the fridge overnight. Reheating in a toaster oven for 30 seconds restores crispiness, and for meal prep, make extras for quick lunches.

FAQs: Frequently Asked Questions About Chicken Katsu Musubi
What is chicken katsu musubi?
What kind of chicken and rice is best for chicken katsu musubi?
How do you shape rice for chicken katsu musubi without a mold?
How long and at what temperature do you fry chicken for chicken katsu musubi?
What sauce goes best with chicken katsu musubi and how do you serve it?

Chicken Katsu Musubi
🍗 Relish the crunchy exterior and juicy chicken in Chicken Katsu Musubi, a portable high-protein pack that’s energizing for lunches and balances carbs from rice for sustained fullness on busy days.
🌿 Wrap up this crispy delight in seaweed for an on-the-go treat blending Japanese flavors with Hawaiian convenience, offering a fun, customizable meal that’s fresh, satisfying, and perfect for picnics or quick bites.
- Total Time: 45 minutes
- Yield: 6 servings
Ingredients
– 1 pound boneless, skinless chicken thighs, pounded to ½ inch thickness
– 2 large eggs
– 3 tablespoons all-purpose flour
– ½ teaspoon salt
– ½ teaspoon black pepper
– 2 cups panko breadcrumbs
– Oil for frying
– Nori sheets cut into thirds
– 6 cups sushi rice, cooked
– Tonkatsu sauce for spreading
Instructions
1-First Step: Prepare the Chicken Start by pounding the chicken thighs to an even ½ inch thickness using a meat mallet or rolling pin. This ensures the meat cooks uniformly and stays juicy, which is key for a great chicken katsu musubi. Once pounded, mix 2 large eggs, 3 tablespoons all-purpose flour, ½ teaspoon salt, and ½ teaspoon black pepper in a shallow dish to form the batter, adjusting with water if it’s too thick. For the best fried chicken, coat each piece in the batter, letting excess drip off, then dredge in 2 cups panko breadcrumbs for that irresistible crunch.
2-Second Step: Fry the Chicken Heat oil in a pan to 350°F and fry the breaded chicken for 4 to 6 minutes until it reaches an internal temperature of 165°F. Flip halfway through for even browning, and don’t overcrowd the pan. After frying, remove the chicken and let it cool on a wire rack to keep it crispy, a technique that works well for busy parents making chicken katsu musubi in batches. This step is where the magic happens, turning simple ingredients into a flavorful main component. For health tips on frying, see this external resource on chicken benefits.
3-Third Step: Cook the Sushi Rice While the chicken rests, cook 6 cups of sushi rice according to package instructions, then season it while warm for the best sticking power. This rice forms the base of your chicken katsu musubi, holding everything together without needing extra fuss. Once done, let it cool slightly but keep it moist for easy shaping, which is ideal for students or working professionals prepping ahead.
4-Fourth Step: Assemble the Musubi Lay a nori sheet strip on a clean surface and moisten a musubi mold or empty tin can to prevent sticking. Pack about ½ cup of sushi rice firmly into the mold placed on the nori, then carefully remove it to form a rectangle. Spread a small amount of tonkatsu sauce on the rice, add a piece of fried chicken on top, and wrap the nori tightly around it, sealing the edges with a little water. This assembly step is straightforward and adaptable; for dietary needs, consider using gluten-free nori if needed.
5-Fifth Step: Final Touches and Serving Once wrapped, let the musubi sit for a minute to set, then slice if desired for easier eating. This chicken katsu musubi is best served fresh to maintain that crispy texture, making it a great lunch option for travelers or seniors. Serve it with extras like pickled veggies for added flavor, and enjoy the balance of textures and tastes in every bite. As a food enthusiast tip, experimenting with portion sizes can make it fit various preferences for this katsu musubi recipe.
Last Step:
Please leave a rating and comment letting us know how you liked this recipe! This helps our business to thrive and continue providing free, high-quality recipes for you.Notes
🍗 Opt for chicken thighs over breasts for juicier, more flavorful results that stay moist during frying and assembly.
🥄 Pounding the chicken to even thickness promotes uniform cooking and tenderness, preventing dry or undercooked spots.
💧 Moisten the musubi mold or can lightly before each use to ensure the sticky rice releases cleanly without breaking the shape.
- Prep Time: 30 minutes
- Cook Time: 15 minutes
- Category: Main Dish
- Method: Frying
- Cuisine: Japanese-Hawaiian
- Diet: High-Protein
Nutrition
- Serving Size: 1 musubi
- Calories: 559 kcal
- Sugar: 2g
- Sodium: 656mg
- Fat: 9g
- Saturated Fat: 2g
- Unsaturated Fat: 5g
- Trans Fat: 0.03g
- Carbohydrates: 81g
- Fiber: 4g
- Protein: 34g
- Cholesterol: 190mg


