Why You’ll Love This Strawberry Jello Mold
This Strawberry Jello Mold is one of those old-fashioned desserts that still wins hearts at every table. It is colorful, creamy, and simple to make, which makes it a smart choice when you want something special without spending all day in the kitchen.
- Easy to make: This Strawberry Jello Mold uses just a few pantry-friendly ingredients and only 10 minutes of prep time. You dissolve the gelatin, mix in the fruit and creamy layer, then let the fridge do the rest.
- Great for busy days: Since the dessert needs at least 6 hours to chill, it is perfect for holidays, potlucks, and family dinners when you want make-ahead ease.
- Creamy and refreshing: The mix of strawberry gelatin, cranberry sauce, and sour cream gives this Strawberry Jello Mold a sweet-tart flavor with a smooth texture that feels fun and nostalgic.
- Flexible for different tastes: You can use jellied or whole-berry cranberry sauce, swap in Greek yogurt, or try another gelatin flavor like raspberry if that is what you have on hand.
This is the kind of dessert that looks fancy on a serving plate but comes together with very little effort.
If you enjoy simple retro desserts, you may also like our easy make-ahead dessert ideas for family gatherings and holidays.
For more fruit nutrition facts, see the health benefits of strawberries and this strawberry nutrition guide.
Jump to:
- Why You’ll Love This Strawberry Jello Mold
- Essential Ingredients for Strawberry Jello Mold
- Special Dietary Options
- How to Prepare the Perfect Strawberry Jello Mold: Step-by-Step Guide
- First Step: Dissolve the gelatin
- Second Step: Add the cold water
- Third Step: Mix the cranberry and sour cream
- Fourth Step: Combine the layers
- Fifth Step: Pour into a mold and chill
- Final Step: Unmold and serve
- Dietary Substitutions to Customize Your Strawberry Jello Mold
- Protein and Main Component Alternatives
- Vegetable, Sauce, and Seasoning Modifications
- Mastering Strawberry Jello Mold: Advanced Tips and Variations
- Pro cooking techniques
- Flavor variations
- Presentation tips
- Make-ahead options
- How to Store Strawberry Jello Mold: Best Practices
- FAQs: Frequently Asked Questions About Strawberry Jello Mold
- Strawberry Jello Mold
- Ingredients
- Instructions
- Last Step:
- Notes
- Nutrition
- Did you make this recipe?
Essential Ingredients for Strawberry Jello Mold
Here is everything you need to make this creamy Strawberry Jello Mold. Each ingredient plays a key role in the taste, texture, and classic molded look.
- 1 6 ounce package strawberry gelatin – Gives the dessert its bright color, fruity flavor, and soft set.
- 2 cups boiling water – Helps the gelatin dissolve fully so the mixture turns smooth.
- 1 cup ice cold water – Cools the gelatin base quickly and helps it start setting.
- 1 15 ounce can jellied cranberry sauce – Adds tart cranberry flavor and a pretty ruby swirl.
- 1 cup sour cream – Brings creaminess and a tangy balance to the sweet gelatin.
- Whipped cream for serving, optional – Adds a soft, sweet finish if you want an extra treat.
Special Dietary Options
- Vegan: Use a plant-based gelatin alternative and swap sour cream for a dairy-free yogurt or coconut-based alternative.
- Gluten-free: This recipe is naturally gluten-free as written, but always check labels on gelatin and cranberry sauce.
- Low-calorie: Choose sugar-free strawberry gelatin, light sour cream, or plain Greek yogurt for a lighter version.
| Ingredient | What It Does |
|---|---|
| Strawberry gelatin | Sets the mold and gives the dessert its signature flavor |
| Cranberry sauce | Adds tartness, body, and a holiday-style color |
| Sour cream | Makes the salad creamy and smooth |
How to Prepare the Perfect Strawberry Jello Mold: Step-by-Step Guide
First Step: Dissolve the gelatin
Start by pouring the 6 ounce package strawberry gelatin into a mixing bowl. Add 2 cups boiling water and stir until the gelatin fully dissolves. This step matters because any grainy bits left behind can affect the texture of your Strawberry Jello Mold.
Use real boiling water here, not just hot water from the tap. The heat helps the gelatin break down fast and evenly. If you are making this for a gathering, this is a good time to set out your mold or bundt pan so it is ready when you need it.
Second Step: Add the cold water
Stir in 1 cup ice cold water right after the gelatin dissolves. This lowers the temperature and helps the mixture start cooling down faster. A colder base is important because it makes the next step easier and helps protect the creamy layer from separating.
After mixing, place the bowl in the refrigerator for about 15 minutes. You want the gelatin to cool, but not fully set. It should still be pourable. If it starts to thicken too much, give it a gentle stir before moving on.
Third Step: Mix the cranberry and sour cream
In a separate bowl, whisk together the 15 ounce can jellied cranberry sauce and 1 cup sour cream until smooth and blended. This is where the dessert gets its signature creamy cranberry layer. You can also use whole-berry cranberry sauce if you like a little extra texture.
Take your time here and break up any large cranberry pieces. The smoother the mixture, the nicer the final slice will look. If you want a lighter version, plain Greek yogurt can stand in for the sour cream, though the flavor will be a little tangier.
Fourth Step: Combine the layers
Once the gelatin has cooled for 15 minutes, gently mix the cranberry-sour cream blend into the bowl. Stir until the mixture looks evenly combined. Try not to rush this part. A slow, steady mix helps keep the creamy texture smooth and prevents little clumps from forming.
Tip from the kitchen: let the gelatin cool fully before mixing in the cranberry and sour cream. That small pause helps the dessert set up better and keeps the texture silky.
If you are using a flavored swap such as raspberry or cranberry gelatin, follow the same mixing method. The process stays simple even if you change the flavor.
Fifth Step: Pour into a mold and chill
Transfer the mixture into a gelatin mold. If you do not have one, a bundt pan or a 9×13-inch pan works well too. Smooth the top with a spoon if needed, then place it in the refrigerator for at least 6 hours. For best results, chill it for the full 8 hours listed in the recipe time.
This is the part that takes patience. The mold needs plenty of time to firm up completely so it can hold its shape when inverted. If you are making it ahead for a party, this long chill time is a big help because it frees up your hands for the rest of the meal.
Final Step: Unmold and serve
When the Strawberry Jello Mold is fully set, loosen the edges carefully with clean fingers or a thin spatula. Then invert it onto a serving plate. If it does not release right away, place the mold in warm water for just a few seconds, but do not let it sit too long or the edges may melt.
Slice the mold and serve it plain or with whipped cream on top if you want an extra creamy finish. The dessert is sweet, cool, and just a little tangy, which makes it a nice change from heavier cakes or pies.

Dietary Substitutions to Customize Your Strawberry Jello Mold
Protein and Main Component Alternatives
This dessert is easy to adapt if you need to change the creamy component. For a lighter feel, use light sour cream instead of full-fat sour cream. If you want a tangy swap with more protein, plain Greek yogurt works nicely and still gives the Strawberry Jello Mold a creamy finish.
If you are serving guests with different preferences, you can also pair the mold with a side of whipped topping instead of folding it in. That lets each person choose how creamy they want each slice.
Vegetable, Sauce, and Seasoning Modifications
Although this is a fruit dessert, you can still change the flavor profile in a few easy ways. Use whole-berry cranberry sauce for more texture or stick with jellied cranberry sauce for a smoother finish. If strawberry is not your favorite, try raspberry or cranberry gelatin for a different twist.
For a less sweet version, use a sugar-free gelatin and skip the whipped cream. If you want a holiday look, add a few fresh berries on top right before serving. That adds color without making the recipe harder.
Here is a simple swap guide:
- Sour cream: Use light sour cream or Greek yogurt
- Strawberry gelatin: Swap for raspberry or cranberry gelatin
- Cranberry sauce: Use jellied or whole-berry cranberry sauce
- Whipped cream: Leave it off for a lighter serving
Mastering Strawberry Jello Mold: Advanced Tips and Variations
Pro cooking techniques
One of the best ways to get a smooth Strawberry Jello Mold is to pay close attention to temperature. The gelatin must dissolve in boiling water first, then cool with ice cold water before the cranberry mixture goes in. If the base is too warm, the sour cream can separate and the dessert may look curdled.
Also, do not leave the set mold sitting in warm water for too long during unmolding. A quick dip is enough. Too much heat can soften the outer layer and make the shape slump.
Flavor variations
If you want to change things up, try swapping the strawberry gelatin for raspberry. It gives the mold a deeper berry taste that still pairs well with cranberry sauce. You can also use whole-berry cranberry sauce for a chunkier bite and a more rustic look.
For a sweeter finish, serve each slice with whipped cream and a few sliced strawberries. For a tangier feel, use plain Greek yogurt in place of sour cream. The recipe stays friendly to quick changes, which is helpful when you are cooking on a budget or using what is already in the fridge.
Presentation tips
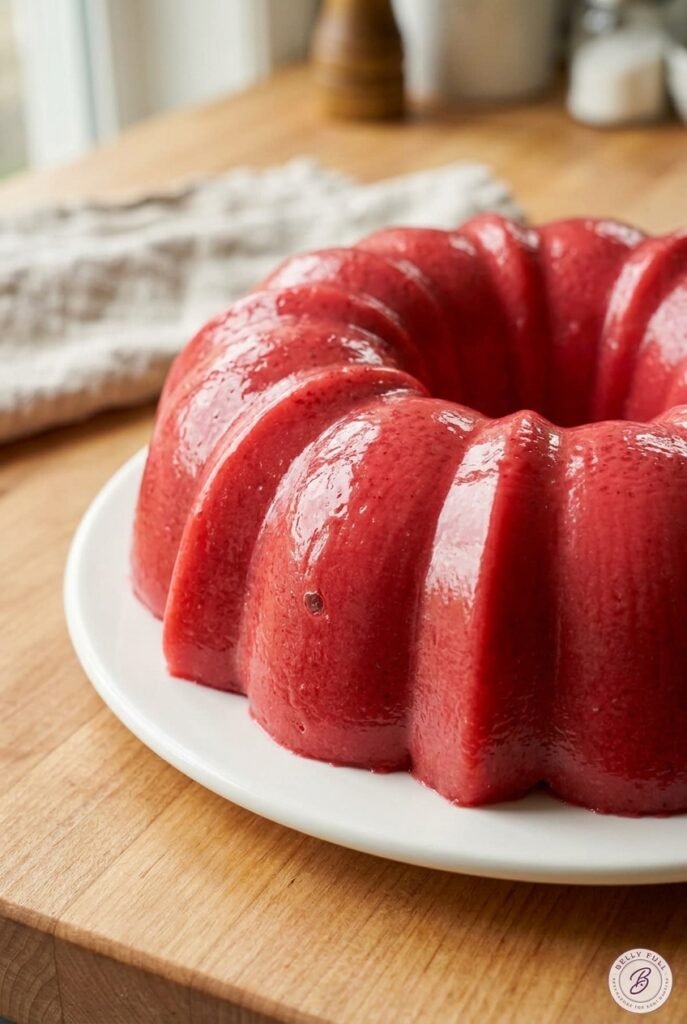
A molded dessert always looks nice when it comes out cleanly, so choose a smooth serving plate with a little rim if possible. If you used a bundt pan, the ring shape gives the Strawberry Jello Mold a pretty holiday style. If you used a 9×13-inch pan, cut neat squares for easy serving at potlucks or school events.
Top each slice with a small spoonful of whipped cream or a tiny berry garnish. Keep the plate simple so the bright pink color stands out.
Make-ahead options
This recipe is a gift for busy schedules. Since it needs at least 6 hours to chill and works well with an 8 hour total time, you can make it the night before a party or family dinner. That leaves you free to focus on the main meal.
It also travels well when kept cold, which makes it a nice choice for holidays, church suppers, office potlucks, and summer picnics. Just keep it refrigerated until serving time.
How to Store Strawberry Jello Mold: Best Practices
Store leftover Strawberry Jello Mold in the refrigerator in a covered container or wrapped tightly with plastic wrap. It will keep well for a few days, though the texture is best in the first 24 to 48 hours after making it.
Freezing is not a great choice for this dessert because gelatin can lose its smooth texture once thawed. If you need a make-ahead dessert for later, it is better to prepare it fresh and keep it chilled until serving.
Reheating is not recommended. This dessert is meant to be served cold, and heat will melt the mold and change the texture. For meal prep, make only the amount you plan to serve within a few days so the flavor and shape stay at their best.
Best storage tip: keep the mold cold from the start of chilling all the way until serving time.

FAQs: Frequently Asked Questions About Strawberry Jello Mold
Print
Strawberry Jello Mold
🍓 Creamy strawberry jello layers swirled with tart cranberry and sour cream – retro-chic, jiggly potluck perfection!
🧊 No-bake chilled mold slices beautifully – effortless holiday side or dessert everyone raves about!
- Total Time: 8 hours 10 minutes
- Yield: 12 servings
Ingredients
– 1 6 ounce package strawberry gelatin
– 2 cups boiling water
– 1 cup ice cold water
– 1 15 ounce can jellied cranberry sauce
– 1 cup sour cream
– Whipped cream for serving, optional
Instructions
1-First Step: Dissolve the gelatin Start by pouring the 6 ounce package strawberry gelatin into a mixing bowl. Add 2 cups boiling water and stir until the gelatin fully dissolves. This step matters because any grainy bits left behind can affect the texture of your Strawberry Jello Mold. Use real boiling water here, not just hot water from the tap. The heat helps the gelatin break down fast and evenly. If you are making this for a gathering, this is a good time to set out your mold or bundt pan so it is ready when you need it.
2-Second Step: Add the cold water Stir in 1 cup ice cold water right after the gelatin dissolves. This lowers the temperature and helps the mixture start cooling down faster. A colder base is important because it makes the next step easier and helps protect the creamy layer from separating. After mixing, place the bowl in the refrigerator for about 15 minutes. You want the gelatin to cool, but not fully set. It should still be pourable. If it starts to thicken too much, give it a gentle stir before moving on.
3-Third Step: Mix the cranberry and sour cream In a separate bowl, whisk together the 15 ounce can jellied cranberry sauce and 1 cup sour cream until smooth and blended. This is where the dessert gets its signature creamy cranberry layer. You can also use whole-berry cranberry sauce if you like a little extra texture. Take your time here and break up any large cranberry pieces. The smoother the mixture, the nicer the final slice will look. If you want a lighter version, plain Greek yogurt can stand in for the sour cream, though the flavor will be a little tangier.
4-Fourth Step: Combine the layers Once the gelatin has cooled for 15 minutes, gently mix the cranberry-sour cream blend into the bowl. Stir until the mixture looks evenly combined. Try not to rush this part. A slow, steady mix helps keep the creamy texture smooth and prevents little clumps from forming. Tip from the kitchen: let the gelatin cool fully before mixing in the cranberry and sour cream. That small pause helps the dessert set up better and keeps the texture silky. If you are using a flavored swap such as raspberry or cranberry gelatin, follow the same mixing method. The process stays simple even if you change the flavor.
5-Fifth Step: Pour into a mold and chill Transfer the mixture into a gelatin mold. If you do not have one, a bundt pan or a 9×13-inch pan works well too. Smooth the top with a spoon if needed, then place it in the refrigerator for at least 6 hours. For best results, chill it for the full 8 hours listed in the recipe time. This is the part that takes patience. The mold needs plenty of time to firm up completely so it can hold its shape when inverted. If you are making it ahead for a party, this long chill time is a big help because it frees up your hands for the rest of the meal.
6-Final Step: Unmold and serve When the Strawberry Jello Mold is fully set, loosen the edges carefully with clean fingers or a thin spatula. Then invert it onto a serving plate. If it does not release right away, place the mold in warm water for just a few seconds, but do not let it sit too long or the edges may melt. Slice the mold and serve it plain or with whipped cream on top if you want an extra creamy finish. The dessert is sweet, cool, and just a little tangy, which makes it a nice change from heavier cakes or pies.
Last Step:
Please leave a rating and comment letting us know how you liked this recipe! This helps our business to thrive and continue providing free, high-quality recipes for you.Notes
🍓 Cool gelatin fully before mixing in cranberry-sour cream to prevent separation.
❄️ Use boiling water to dissolve and ice water for quick set; chill 8+ hours for best firmness.
🔄 No mold? Use bundt pan or 9×13 dish; swap flavors like raspberry gelatin.
- Prep Time: 10 minutes
- Chill: 8 hours
- Cook Time: 0 minutes
- Category: Desserts
- Method: Chilling
- Cuisine: American
- Diet: Vegetarian
Nutrition
- Serving Size: 1 slice
- Calories: 173 kcal
- Sugar: 31g
- Sodium: 109mg
- Fat: 4g
- Saturated Fat: 2g
- Unsaturated Fat: 2g
- Trans Fat: 0g
- Carbohydrates: 32g
- Fiber: 0g
- Protein: 1g
- Cholesterol: 11mg


