Why You’ll Love This Raising Canes Sauce
Raising Canes Sauce is one of those simple recipes that just works. It is creamy, tangy, a little peppery, and perfect for dipping just about anything. If you have ever wanted that famous fast-food flavor at home, this copycat version is about as easy as it gets.
- Fast and easy: This recipe takes just 3 minutes to mix together, with no cooking needed. All you do is stir the ingredients in a bowl and let the fridge do the rest.
- Great for busy schedules: Since it needs chilling time, you can make it ahead and have it ready when dinner rolls around. That makes it a smart pick for parents, students, and working folks.
- Works with lots of foods: Use Raising Canes Sauce as a dip for chicken tenders, fries, burgers, sandwiches, onion rings, or even veggies.
- Big flavor in a small batch: The mix of mayo, ketchup, Worcestershire sauce, garlic powder, black pepper, and salt gives this sauce its signature bold, savory taste.
Next time you make this sauce, stir in the ingredients and let it chill for a few hours to get that perfect tangy flavor for your chicken tenders.
If you like copycat sauces that taste like the real thing, this one belongs in your regular rotation. It is also easy to tweak for different tastes, which makes it a handy sauce for family meals, game day snacks, or quick weeknight dinners. If you enjoy easy dip recipes, you may also like our Kitchen CC recipe collection for more homemade favorites.
Jump to:
- Why You’ll Love This Raising Canes Sauce
- Essential Ingredients for Raising Canes Sauce
- Special Dietary Options
- How to Prepare the Perfect Raising Canes Sauce: Step-by-Step Guide
- First Step: Gather and measure everything
- Second Step: Add the creamy base and seasonings
- Third Step: Stir until fully mixed
- Fourth Step: Taste and make small adjustments
- Fifth Step: Chill for at least 6 hours
- Final Step: Stir again and serve cold
- Dietary Substitutions to Customize Your Raising Canes Sauce
- Protein and Main Component Alternatives
- Vegetable, Sauce, and Seasoning Modifications
- Mastering Raising Canes Sauce: Advanced Tips and Variations
- Pro cooking techniques
- Flavor variations
- Presentation tips
- Make-ahead options
- How to Store Raising Canes Sauce: Best Practices
- Nutrition Facts for Raising Canes Sauce
- FAQs: Frequently Asked Questions About Raising Canes Sauce
- What are the ingredients in Raising Cane’s sauce?
- How do you make copycat Raising Cane’s sauce at home?
- Why does Cane’s sauce taste better overnight?
- How long does homemade Raising Cane’s sauce last?
- Can I substitute ingredients in Cane’s sauce recipe?
- Raising Canes Sauce
- Ingredients
- Instructions
- Last Step:
- Notes
- Nutrition
- Did you make this recipe?
Essential Ingredients for Raising Canes Sauce
To make Raising Canes Sauce at home, you only need a handful of pantry staples. The measurements matter here because the flavor balance is what makes the sauce taste so close to the original.
- 4.4 ounces (1/2 cup) mayonnaise: This gives the sauce its creamy texture and rich base.
- 2.6 ounces (3 tablespoons) ketchup: Adds sweetness, color, and a light tomato tang.
- 1.5 tablespoons Worcestershire sauce: Brings savory depth and that familiar fast-food flavor. If needed, you can use balsamic vinegar, soy sauce, or fish sauce as a substitute.
- 1 teaspoon garlic powder: Adds a mellow garlic flavor without any chopping.
- 1/2 teaspoon coarse black pepper: Gives the sauce its signature bite and a little heat.
- 1/2 teaspoon salt: Balances the sweetness and sharpness of the other ingredients.
Special Dietary Options
- Vegan: Use vegan mayonnaise and swap Worcestershire sauce for soy sauce or coconut aminos.
- Gluten-free: Choose a gluten-free Worcestershire sauce or use balsamic vinegar instead.
- Low-calorie: Try light mayo or a half mayo, half plain Greek yogurt blend for a lighter version.
| Ingredient | Amount | Why It Matters |
|---|---|---|
| Mayonnaise | 1/2 cup | Creates the creamy base |
| Ketchup | 3 tablespoons | Adds tang and sweetness |
| Worcestershire sauce | 1.5 tablespoons | Builds savory depth |
| Garlic powder | 1 teaspoon | Gives gentle garlic flavor |
| Coarse black pepper | 1/2 teaspoon | Adds signature bite |
| Salt | 1/2 teaspoon | Rounds out the flavor |
For a better sense of the ketchup in this sauce, you can check out this helpful breakdown from Healthline’s ketchup nutrition facts. If you are curious about Worcestershire sauce and its flavor profile, this article on Worcestershire sauce uses and taste is worth a look.
How to Prepare the Perfect Raising Canes Sauce: Step-by-Step Guide
Making Raising Canes Sauce at home is very easy, but the small details matter. The ingredients need time to sit together so the flavors can blend into that familiar creamy, peppery dip. The good news is that the hands-on work takes only a few minutes.
First Step: Gather and measure everything
Start by setting out all of your ingredients before you mix anything. Measure 1/2 cup mayonnaise, 3 tablespoons ketchup, 1.5 tablespoons Worcestershire sauce, 1 teaspoon garlic powder, 1/2 teaspoon coarse black pepper, and 1/2 teaspoon salt. Using exact measurements gives you a sauce that tastes balanced instead of too salty or too sharp.
If you want to make the process even smoother, use a medium mixing bowl and a whisk or spoon. A small bowl can work, but a medium one gives you enough room to stir without spilling. This step takes less than a minute, yet it sets you up for a cleaner and easier mix.
Second Step: Add the creamy base and seasonings
Place the mayonnaise in the bowl first. Then add the ketchup, Worcestershire sauce, garlic powder, black pepper, and salt. Putting the mayo in first helps the other ingredients blend more evenly as you stir.
At this stage, the sauce will look a little streaky and uneven. That is completely normal. The flavors have not come together yet, so do not worry if it looks too red, too pale, or too speckled at first. Once you stir, the texture will smooth out fast.
Third Step: Stir until fully mixed
Mix everything together with a spoon or whisk until the sauce is completely smooth. Make sure you scrape the sides and bottom of the bowl so no mayo or spice pockets stay hidden. This should take about 1 to 2 minutes of steady stirring.
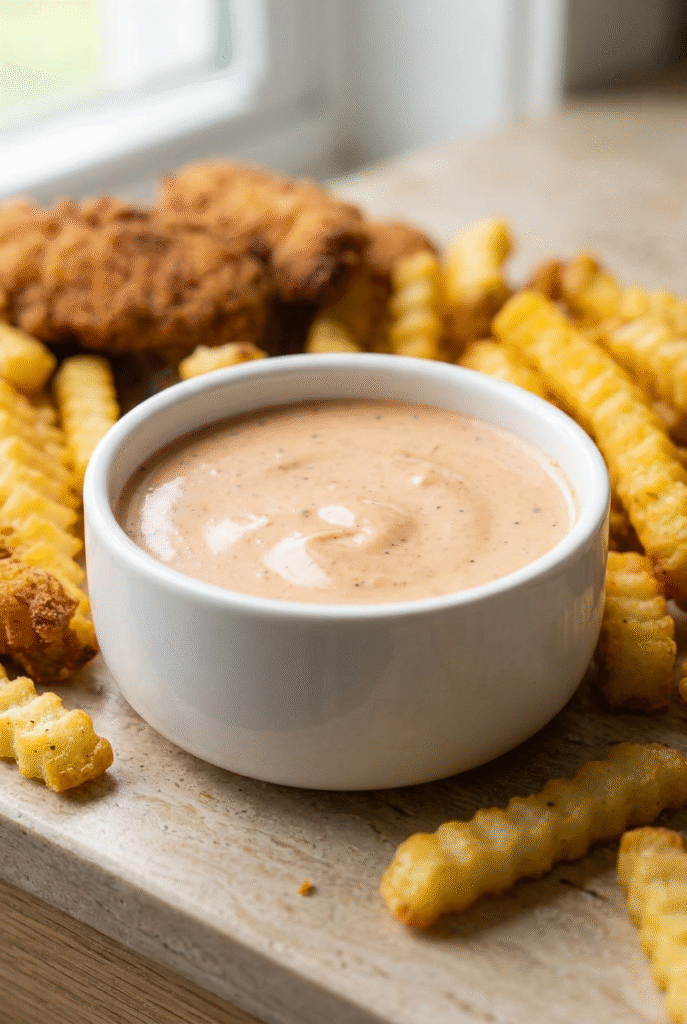
The sauce should end up creamy, lightly pinkish-brown, and speckled with pepper. If you are making a double batch, stir a little longer to make sure every bit is evenly combined. A fully mixed sauce will taste more like the restaurant version after chilling.
The flavor gets better after resting, so the fridge time is not optional if you want the best copycat taste.
Fourth Step: Taste and make small adjustments
Before chilling, give the sauce a quick taste. If you want more heat, add a pinch more black pepper. If you like a stronger savory note, add a tiny splash more Worcestershire sauce. If the flavor feels flat, a little more salt can help.
Be careful not to add too much at once. This sauce has a short ingredient list, so a small change can make a big difference. A little extra pepper can be nice, but too much can overpower the creamy base. Taste, adjust, and stop when it feels right.
Fifth Step: Chill for at least 6 hours
Transfer the sauce to a container with a tight lid or keep it in the mixing bowl covered well. Refrigerate for at least 6 hours so the flavors can meld. If you have the time, make it a day ahead. That longer rest gives you the best flavor and a smoother finish.
This chilling step is what turns a good sauce into a great one. The mayo softens the sharpness of the pepper, the ketchup adds sweetness, and the Worcestershire sauce sinks into the background to create that signature savory note. After 24 hours, the sauce usually tastes more rounded and more like the original.
Final Step: Stir again and serve cold
When you are ready to serve, give the sauce one more stir. This helps bring the texture back together, especially if it has thickened in the fridge. Serve it cold with chicken tenders, fries, burgers, sandwiches, or whatever else you are craving.
The total prep time is only 3 minutes, plus chilling. That means this is a very low-effort recipe with a big payoff. It is perfect for family dinners, snack trays, party platters, and lunchbox dipping on the go.

Dietary Substitutions to Customize Your Raising Canes Sauce
Protein and Main Component Alternatives
Since this is a sauce recipe, the main base is mayonnaise. If you want a different option, light mayo works well and keeps the same creamy feel. Greek yogurt can also be used for a tangier and lighter sauce, though the texture will be a little different.
For a vegan version, choose a plant-based mayonnaise. Most grocery stores carry one now, and it blends in nicely. If you want to keep the sauce rich but cut some calories, try mixing half mayo and half plain Greek yogurt. That gives you a creamy dip with a lighter finish.
Vegetable, Sauce, and Seasoning Modifications
Worcestershire sauce is a key part of the flavor, but you can swap it if needed. Balsamic vinegar gives a gentle tang, soy sauce adds salt and depth, and fish sauce gives a bold savory kick. If you want a vegan-friendly option, soy sauce or coconut aminos work well.
You can also play with the seasonings. A pinch of cayenne pepper adds heat, while onion powder gives the sauce more savory depth. Smoked paprika can add a subtle smoky note, and a little fresh minced garlic can be used instead of garlic powder if that is what you have on hand. These changes can make the sauce fit your taste without losing the core idea.
Mastering Raising Canes Sauce: Advanced Tips and Variations
Once you make Raising Canes Sauce a few times, you may want to fine-tune it to fit your own taste. The basic recipe is simple, but there are a few tricks that can make a real difference in the final flavor and texture.
Pro cooking techniques
Use finely ground or coarse black pepper depending on how much bite you want. Coarse pepper gives you a more noticeable pepper pop, which many people like in this sauce. For the smoothest texture, whisk well for a full minute or two before chilling.
Letting the sauce sit overnight is the biggest tip of all. The flavors blend better after 12 to 24 hours, and the sauce becomes less sharp and more balanced. If you are making it for a party, do it the day before so it is ready when guests arrive.
Flavor variations
If you want a little heat, add cayenne pepper in small pinches. For a more savory flavor, try onion powder in place of some of the garlic powder. You can also add a tiny bit more ketchup if you want it sweeter or a touch more Worcestershire if you want a deeper flavor.
Some people like a smoky version with a little paprika, while others prefer a sharper, pepper-heavy dip. The nice thing about this sauce is that you can adjust it without making it hard to prepare. Just keep the changes small so you still stay close to the classic taste.
Presentation tips
Serve the sauce in a small bowl with a spoon or in a ramekin beside a platter of chicken tenders or fries. A light sprinkle of black pepper on top can make it look extra appealing. For parties, set it in the center of a snack board with burgers, sliders, onion rings, and toasted bread.
For a cleaner look, use a clear glass jar or small bowl so guests can see the creamy texture. It may be a simple sauce, but a neat presentation makes it feel special.
Make-ahead options
This is a perfect make-ahead sauce. Since it needs time to chill, you can prepare it up to 24 hours in advance and keep it in the fridge until serving. That makes it great for meal prep, game day spreads, and weeknight planning.
If you are hosting, make a double batch so you do not run out. The sauce stores well and is easy to portion out. Keeping extra on hand also means you can use it for leftovers the next day.
How to Store Raising Canes Sauce: Best Practices
Proper storage helps keep Raising Canes Sauce tasting fresh and safe. Since it contains mayonnaise, it should always stay cold when not being served.
- Refrigeration: Store the sauce in an airtight container in the fridge for 3 to 5 days for the best freshness. Some batches can last longer, but for the best taste and texture, use it sooner.
- Freezing: Freezing is not the best choice for this sauce because mayo can separate after thawing. If you do freeze it, the texture may change.
- Reheating: This sauce is meant to be served cold, so there is no need to reheat it. Just stir and serve straight from the fridge.
- Meal prep: Make it ahead in a sealed jar or container, label it with the date, and keep it in the coldest part of the fridge.
If you want the freshest flavor, make only what you will use within a few days. That way the texture stays smooth and the sauce tastes bright and clean.
Nutrition Facts for Raising Canes Sauce
For readers watching what they eat, here is a closer look at the nutritional information per 2-tablespoon serving.
| Nutrient | Amount |
|---|---|
| Calories | 159 |
| Carbohydrates | 5g |
| Protein | 0.4g |
| Total Fat | 16g |
| Saturated Fat | 2g |
| Polyunsaturated Fat | 9g |
| Monounsaturated Fat | 3g |
| Trans Fat | 0.04g |
| Cholesterol | 9mg |
| Sodium | 496mg |
| Potassium | 82mg |
| Fiber | 0.1g |
| Sugar | 3g |
| Vitamin A | 81 IU |
| Vitamin C | 1mg |
| Calcium | 9mg |
| Iron | 0.4mg |
This sauce is rich, so a little goes a long way. It is best as a dip or spread rather than something you would use in large amounts. If you are tracking sodium or fat closely, you may want to try a lighter mayo version.

FAQs: Frequently Asked Questions About Raising Canes Sauce
What are the ingredients in Raising Cane’s sauce?
How do you make copycat Raising Cane’s sauce at home?
Why does Cane’s sauce taste better overnight?
How long does homemade Raising Cane’s sauce last?
Can I substitute ingredients in Cane’s sauce recipe?

Raising Canes Sauce
🥫 Spot-on Raising Cane’s copycat sauce – creamy, tangy, garlicky magic that transforms chicken tenders and fries!
🍟 5-minute mix chills to perfection – versatile dip for burgers, sandwiches, or veggies beats takeout every time!
- Total Time: 6 hours 3 minutes
- Yield: 1 cup (8 servings)
Ingredients
– 1/2 cup mayonnaise for creamy base
– 3 tablespoons ketchup for tang and sweetness
– 1.5 tablespoons Worcestershire sauce for savory depth
– 1 teaspoon garlic powder for gentle garlic flavor
– 1/2 teaspoon coarse black pepper for signature bite
– 1/2 teaspoon salt for rounding out the flavor
Instructions
1-First Step: Gather and measure everything Start by setting out all of your ingredients before you mix anything. Measure 1/2 cup mayonnaise, 3 tablespoons ketchup, 1.5 tablespoons Worcestershire sauce, 1 teaspoon garlic powder, 1/2 teaspoon coarse black pepper, and 1/2 teaspoon salt. Using exact measurements gives you a sauce that tastes balanced instead of too salty or too sharp. If you want to make the process even smoother, use a medium mixing bowl and a whisk or spoon. A small bowl can work, but a medium one gives you enough room to stir without spilling. This step takes less than a minute, yet it sets you up for a cleaner and easier mix.
2-Second Step: Add the creamy base and seasonings Place the mayonnaise in the bowl first. Then add the ketchup, Worcestershire sauce, garlic powder, black pepper, and salt. Putting the mayo in first helps the other ingredients blend more evenly as you stir. At this stage, the sauce will look a little streaky and uneven. That is completely normal. The flavors have not come together yet, so do not worry if it looks too red, too pale, or too speckled at first. Once you stir, the texture will smooth out fast.
3-Third Step: Stir until fully mixed Mix everything together with a spoon or whisk until the sauce is completely smooth. Make sure you scrape the sides and bottom of the bowl so no mayo or spice pockets stay hidden. This should take about 1 to 2 minutes of steady stirring. The sauce should end up creamy, lightly pinkish-brown, and speckled with pepper. If you are making a double batch, stir a little longer to make sure every bit is evenly combined. A fully mixed sauce will taste more like the restaurant version after chilling. The flavor gets better after resting, so the fridge time is not optional if you want the best copycat taste.
4-Fourth Step: Taste and make small adjustments Before chilling, give the sauce a quick taste. If you want more heat, add a pinch more black pepper. If you like a stronger savory note, add a tiny splash more Worcestershire sauce. If the flavor feels flat, a little more salt can help. Be careful not to add too much at once. This sauce has a short ingredient list, so a small change can make a big difference. A little extra pepper can be nice, but too much can overpower the creamy base. Taste, adjust, and stop when it feels right.
5-Fifth Step: Chill for at least 6 hours Transfer the sauce to a container with a tight lid or keep it in the mixing bowl covered well. Refrigerate for at least 6 hours so the flavors can meld. If you have the time, make it a day ahead. That longer rest gives you the best flavor and a smoother finish. This chilling step is what turns a good sauce into a great one. The mayo softens the sharpness of the pepper, the ketchup adds sweetness, and the Worcestershire sauce sinks into the background to create that signature savory note. After 24 hours, the sauce usually tastes more rounded and more like the original.
6-Final Step: Stir again and serve cold When you are ready to serve, give the sauce one more stir. This helps bring the texture back together, especially if it has thickened in the fridge. Serve it cold with chicken tenders, fries, burgers, sandwiches, or whatever else you are craving. The total prep time is only 3 minutes, plus chilling. That means this is a very low-effort recipe with a big payoff. It is perfect for family dinners, snack trays, party platters, and lunchbox dipping on the go.
Last Step:
Please leave a rating and comment letting us know how you liked this recipe! This helps our business to thrive and continue providing free, high-quality recipes for you.Notes
⏳ Chill 24 hours max for deepest, most authentic flavor development.
🌶️ Add cayenne or onion powder to customize heat and savoriness.
🫙 Store airtight in fridge up to 5 days; stir before each use.
- Prep Time: 3 minutes
- Chill: 6 hours
- Cook Time: 0 minutes
- Category: Sauces
- Method: No-Cook
- Cuisine: American
Nutrition
- Serving Size: 2 tablespoons
- Calories: 159 kcal
- Sugar: 3g
- Sodium: 496mg
- Fat: 16g
- Saturated Fat: 2g
- Unsaturated Fat: 12g
- Trans Fat: 0g
- Carbohydrates: 5g
- Fiber: 0.1g
- Protein: 0.4g
- Cholesterol: 9mg


