Why You’ll Love This One Ingredient Banana Ice Cream
Picture this: it’s a scorching summer day, and you crave something cool and sweet without the guilt. That’s where one ingredient banana ice cream swoops in like a hero! This recipe changed my snack game forever. I first stumbled upon it during a heatwave, desperate for a dairy-free treat, and now it’s my go-to for busy afternoons.
Let me break down the magic:
- Ease of preparation: You only need one ingredient banana ice cream basics a single ripe banana! Chop, freeze, blend, done. Prep time is just 2 hours, mostly hands-off freezing. No cooking, no fancy gadgets beyond a food processor. Perfect for busy parents or students whipping up a treat in minutes after school.
- Health benefits: Clocking in at 61 calories per serving, this one ingredient banana ice cream packs fiber, potassium, and natural sweetness. It’s low-fat (0.2g fat), dairy-free, vegan, gluten-free, and fits paleo, low-sodium diets. Check out the benefits of bananas for why they boost your wellness. Ideal for diet-conscious folks!
- Versatility: Adapt this one ingredient banana ice cream for any diet egg-free, nut-free, soy-free, you name it. Scale for parties or solo snacks. Serves 2 from one banana, about 1 cup total. Travelers and seniors love its portability.
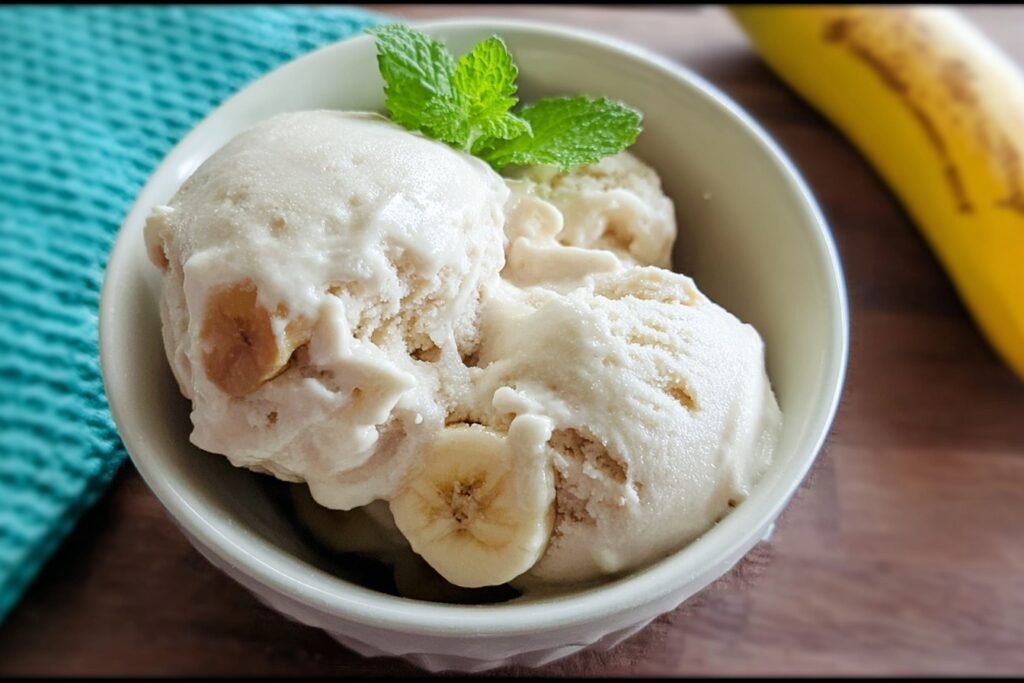
- Distinctive flavor: Ripe bananas turn into creamy soft-serve magic, naturally sweet without added sugar. That gooey, aerated texture rivals store-bought, but healthier!
Who knew simplicity could taste this good? Whether you’re a food enthusiast or party host, this treat delights everyone.
Jump to:
- Why You’ll Love This One Ingredient Banana Ice Cream
- Essential Ingredients for One Ingredient Banana Ice Cream
- How to Prepare the Perfect One Ingredient Banana Ice Cream: Step-by-Step Guide
- Dietary Substitutions to Customize Your One Ingredient Banana Ice Cream
- Protein and Main Component Alternatives
- Vegetable, Sauce, and Seasoning Modifications
- Mastering One Ingredient Banana Ice Cream: Advanced Tips and Variations
- How to Store One Ingredient Banana Ice Cream: Best Practices
- FAQs: Frequently Asked Questions About One Ingredient Banana Ice Cream
- How do you make one ingredient banana ice cream?
- Are frozen bananas the only ingredient needed for banana ice cream?
- How do you freeze bananas for homemade ice cream?
- How long does one ingredient banana ice cream last in the freezer?
- Can you add flavors to one ingredient banana ice cream?
- One Ingredient Banana Ice Cream
- Ingredients
- Instructions
- Last Step:
- Notes
- Nutrition
- Did you make this recipe?
Essential Ingredients for One Ingredient Banana Ice Cream
Keeping it ultra-simple, here’s everything for your one ingredient banana ice cream. Focus on quality for the best results.
Main Ingredients:
- 1 large ripe banana – Provides natural sweetness, creaminess, and all nutrients; choose soft, spotty ones for peak flavor.
No extras needed that’s the beauty!
Equipment:
- Knife
- Cutting board
- Airtight freezer-safe container
- Small food processor
- Spatula
Special Dietary Options:
- Vegan: Naturally plant-based with bananas.
- Gluten-free: Inherently gluten-free.
- Low-calorie: Just 61 calories per serving, low-fat option.
Nutritional breakdown per serving (makes 1 cup, serves 2):
| Nutrient | Amount | % Daily Value |
|---|---|---|
| Calories | 61 | – |
| Fat | 0.2g | 0.3% |
| Saturated Fat | 0.1g | 0.4% |
| Carbs | 15.5g | 5.2% |
| Fiber | 1.8g | 7.1% |
| Sugars | 8.3g | – |
| Protein | 0.7g | 1.5% |
| Sodium | 0.7mg | 0.0% |
Dietary tags: red-meat-free, wheat-free, paleo, no-oil-added, dairy-free, kidney-friendly, pork-free, vegetarian, gluten-free, alcohol-free, pescatarian, soy-free, low-sodium, egg-free, peanut-free, vegan, low-fat, fish-free, tree-nut-free, shellfish-free.
How to Prepare the Perfect One Ingredient Banana Ice Cream: Step-by-Step Guide
Ready to make one ingredient banana ice cream? It’s foolproof! I’ve made batches for family picnics, and it always wows. Prep time: 2 hours (mostly freezing). Let’s dive in with enthusiasm.
First Step: Select your banana
Grab 1 large ripe banana it should be sweet and soft with brown spots. Ripe ones convert starch to sugar, giving that ice cream sweetness. Avoid green ones; they’ll taste bland. Slice tip: if scaling up, use your small food processor’s capacity.
Second Step: Peel and chop
Peel the banana using a knife on a cutting board. Chop into small even pieces, about 1/2-inch coins. Even sizes freeze uniformly and blend smoothly. Pro tip: do this quickly to minimize browning. For vegan diets, it’s perfect as-is!
Third Step: Freeze the pieces
Place pieces in an airtight freezer-safe container or bag. Spread them out if possible to freeze solid faster. Pop in the freezer for at least 2 hours, ideally overnight. This step builds the creamy base. Patience here pays off rushed freezing leads to icy bits.
I remember freezing extras during a road trip prep; they kept us cool for days!
Fourth Step: Initial pulse
Once solid, add frozen pieces to your small food processor. Pulse in short bursts. It’ll crumbly at first that’s normal! Scrape sides with a spatula. A powerful high-speed blender works too if your processor struggles.
Fifth Step: Blend to gooey
Keep pulsing until crumbly, then blend continuously. Scrape down sides often. It turns gooey like mush magic happening! This aeration creates soft-serve texture. Takes 2-4 minutes total blending.
Sixth Step: Smooth out chunks
Blend further until smoother, still with chunks. Scrape again. Persistence is key; it transforms before your eyes. For low-fat diets, no changes needed.
Seventh Step: Achieve creamy texture
Blend more until creamy soft-serve consistency. Aerate by running longer it fluffs up! Taste test; naturally sweet perfection. Dietary adaptations? Still one ingredient bliss.
Eighth Step: Add mix-ins if desired
Now, stir in extras like peanut butter or cinnamon post-blend. Keeps it customizable for food enthusiasts.
Final Step: Serve or store
Eat immediately as soft-serve, or transfer to container and freeze 1-2 hours for scoops. Serves 2 happy eaters! Troubleshooting: if powdery, let thaw 1 minute and retry.
This one ingredient banana ice cream feels like cheating so easy, yet restaurant-quality!
Expand for parties: double bananas if equipment allows. Working pros, prep ahead. You’ve got this!

Dietary Substitutions to Customize Your One Ingredient Banana Ice Cream
Protein and Main Component Alternatives
Banana is the star, but swap for similar fruits if needed. Try frozen mango chunks for tropical twist same process, vegan still. For more protein, blend in a scoop of plant protein post-creaming, keeping low-fat vibe. Availability issue? Plantains work for firmer texture, naturally sweet.
Vegetable, Sauce, and Seasoning Modifications
Add frozen berries for tartness, or spinach for green boost (hides well!). No sauces needed, but swirl honey post-blend. Season with ginger or cardamom for warmth. Seasonal: summer strawberries, winter cinnamon. All keep it gluten-free, dairy-free.
These tweaks suit busy parents or seniors quick changes!
Mastering One Ingredient Banana Ice Cream: Advanced Tips and Variations
Level up your one ingredient banana ice cream game! Here’s how I nail it every time.
Pro cooking techniques: Small food processor best for aeration; scrape religiously. Freeze overnight for pro creaminess.
Flavor variations: Mix-ins: peanut butter, honey, chocolate chips, almonds, cookie butter, cocoa powder, cinnamon, cardamom, ginger. Try strawberry by blending half berries.
Love shakes? Check my banana milkshake recipe for inspo.
Presentation tips: Swirl in bowls, top with nuts. Serve in cones for parties.
Make-ahead options: Freeze portions in bags up to 3 months. Blend fresh for best texture.
Scale up, experiment endless fun!
How to Store One Ingredient Banana Ice Cream: Best Practices
Store smart to enjoy later!
Refrigeration: Soft-serve lasts 1 day in fridge, covered. Softens quickly.
Freezing: Airtight container, plastic wrap on surface, up to 2 weeks. Prevents crystals.
Reheating: Thaw 5-10 mins at room temp. No microwave stays creamy.
Meal prep considerations: Portion for grab-and-go. Great for travelers, students.
Check banana benefits they preserve well!

FAQs: Frequently Asked Questions About One Ingredient Banana Ice Cream
How do you make one ingredient banana ice cream?
Are frozen bananas the only ingredient needed for banana ice cream?
How do you freeze bananas for homemade ice cream?
How long does one ingredient banana ice cream last in the freezer?
Can you add flavors to one ingredient banana ice cream?

One Ingredient Banana Ice Cream
🍌 Transform ripe bananas into creamy, naturally sweet soft-serve ice cream—vegan, dairy-free indulgence with zero added sugar or guilt.
🍨 Just 5 minutes blending after freezing; endlessly customizable healthy dessert beats store-bought every time.
- Total Time: 2 hours 5 minutes
- Yield: 2 servings
Ingredients
– 1 large ripe banana for natural sweetness, creaminess, and all nutrients
Instructions
1-First Step: Select your banana Grab 1 large ripe banana it should be sweet and soft with brown spots. Ripe ones convert starch to sugar, giving that ice cream sweetness. Avoid green ones; they’ll taste bland. Slice tip: if scaling up, use your small food processor’s capacity.
2-Second Step: Peel and chop Peel the banana using a knife on a cutting board. Chop into small even pieces, about 1/2-inch coins. Even sizes freeze uniformly and blend smoothly. Pro tip: do this quickly to minimize browning. For vegan diets, it’s perfect as-is!
3-Third Step: Freeze the pieces Place pieces in an airtight freezer-safe container or bag. Spread them out if possible to freeze solid faster. Pop in the freezer for at least 2 hours, ideally overnight. This step builds the creamy base. Patience here pays off rushed freezing leads to icy bits.
4-Fourth Step: Initial pulse Once solid, add frozen pieces to your small food processor. Pulse in short bursts. It’ll crumbly at first that’s normal! Scrape sides with a spatula. A powerful high-speed blender works too if your processor struggles.
5-Fifth Step: Blend to gooey Keep pulsing until crumbly, then blend continuously. Scrape down sides often. It turns gooey like mush magic happening! This aeration creates soft-serve texture. Takes 2-4 minutes total blending.
6-Sixth Step: Smooth out chunks Blend further until smoother, still with chunks. Scrape again. Persistence is key; it transforms before your eyes. For low-fat diets, no changes needed.
7-Seventh Step: Achieve creamy texture Blend more until creamy soft-serve consistency. Aerate by running longer it fluffs up! Taste test; naturally sweet perfection. Dietary adaptations? Still one ingredient bliss.
8-Eighth Step: Add mix-ins if desired Now, stir in extras like peanut butter or cinnamon post-blend. Keeps it customizable for food enthusiasts.
9-Final Step: Serve or store Eat immediately as soft-serve, or transfer to container and freeze 1-2 hours for scoops. Serves 2 happy eaters! Troubleshooting: if powdery, let thaw 1 minute and retry.
Last Step:
Please leave a rating and comment letting us know how you liked this recipe! This helps our business to thrive and continue providing free, high-quality recipes for you.Notes
🍌 Choose very ripe bananas with brown spots for peak natural sweetness and creaminess.
🔪 Use a small food processor for best aeration and smooth texture—avoid large blenders.
🍨 Scale up batches if equipment allows; eat right away or refreeze briefly for firmer scoops.
- Prep Time: 5 minutes
- Freezing: 2 hours
- Cook Time: 0 minutes
- Category: Desserts
- Method: Freezing
- Cuisine: American
- Diet: Vegan, Gluten-Free, Dairy-Free, Low-Fat
Nutrition
- Serving Size: 1/2 cup
- Calories: 61 kcal
- Sugar: 8.3g
- Sodium: 0.7mg
- Fat: 0.2g
- Saturated Fat: 0.1g
- Unsaturated Fat: 0.1g
- Trans Fat: 0g
- Carbohydrates: 15.5g
- Fiber: 1.8g
- Protein: 0.7g
- Cholesterol: 0mg


