Why You’ll Love This Icebox Cake
If you love a dessert that looks fancy but comes together with almost no stress, this Icebox Cake is for you. It is a no bake cake that layers chocolate graham crackers, sweet cream filling, and rich ganache into a dessert that tastes like it took hours to make. This chocolate icebox cake recipe is a great fit for busy parents, party hosts, students, and anyone who wants an easy no bake dessert that still feels special.
- Easy to prepare: This icebox cake recipe uses simple pantry-friendly steps and only needs about 45 minutes of active prep time. Since there is no oven involved, it is a smart choice for hot days, weeknight desserts, and last-minute gatherings.
- Rich but flexible: The mix of chocolate graham crackers, cream cheese filling, and ganache gives the dessert a classic chocolate icebox cake flavor, but you can swap in regular graham crackers or chocolate wafer cookies if needed.
- Great for make-ahead plans: Like any good refrigerator cake, this dessert needs chilling time, which makes it perfect for holidays, potlucks, birthdays, and weekends when you want dessert ready before guests arrive.
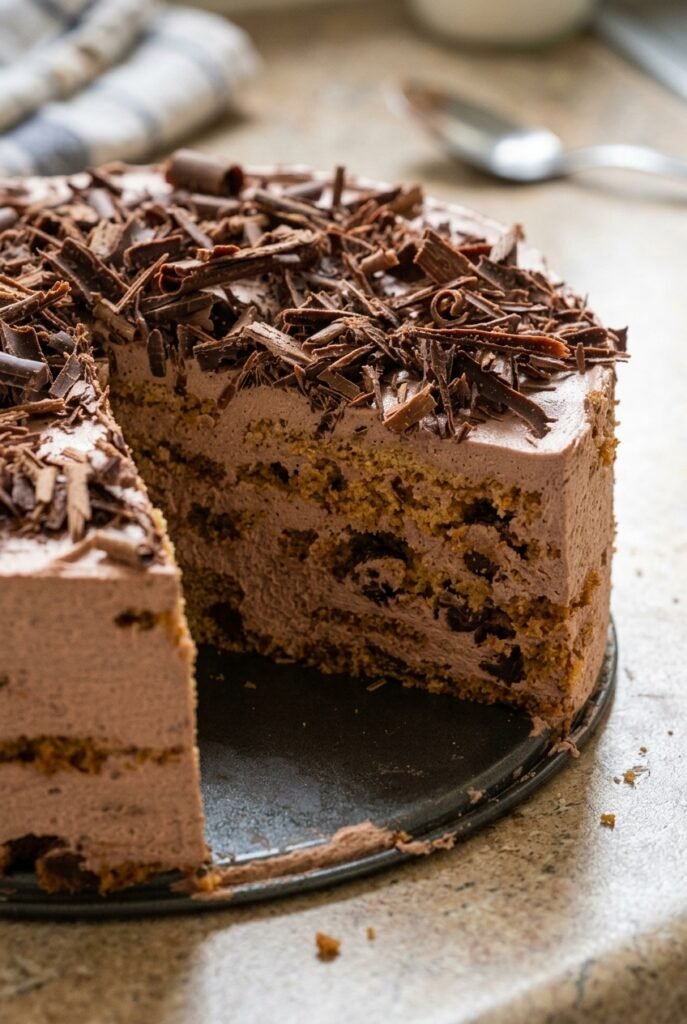
- Standout flavor and texture: The soft crackers, fluffy cream, and glossy chocolate ganache create that signature sliceable texture people love in an icebox cake. Each bite is creamy, cool, and deeply chocolatey.
Tip: If you want a dessert that gets better as it rests, this chocolate icebox cake is a strong choice. The chill time helps the layers soften into a cake-like texture.
For readers who enjoy learning more about ingredients, you may also like our kitchen ideas and recipe collection for more easy desserts and crowd-pleasing treats.
Chocolate also brings a rich flavor that many dessert lovers crave, and you can read more about it from the Mayo Clinic’s look at the health benefits of chocolate.
Jump to:
- Why You’ll Love This Icebox Cake
- Essential Ingredients for Icebox Cake
- Main Ingredients
- Special Dietary Options
- How to Prepare the Perfect Icebox Cake: Step-by-Step Guide
- First Step: Make the ganache
- Second Step: Whip the cream filling
- Third Step: Build the first layer
- Fourth Step: Repeat the layers
- Final Step: Finish and chill
- Dietary Substitutions to Customize Your Icebox Cake
- Protein and Main Component Alternatives
- Vegetable, Sauce, and Seasoning Modifications
- Mastering Icebox Cake: Advanced Tips and Variations
- Pro cooking techniques
- Flavor variations
- Presentation tips
- Make-ahead options
- How to Store Icebox Cake: Best Practices
- Refrigeration
- Freezing
- Reheating
- Meal prep considerations
- FAQs: Frequently Asked Questions About Icebox Cake
- What is icebox cake?
- How do you make icebox cake at home?
- What cookies work best for icebox cake?
- How long does icebox cake need to chill?
- Can you make icebox cake ahead and freeze it?
- Icebox Cake
- Ingredients
- Instructions
- Last Step:
- Notes
- Nutrition
- Did you make this recipe?
Essential Ingredients for Icebox Cake
Here is everything you need for this chocolate graham cracker dessert recipe. Each ingredient plays a specific role, from building structure to creating that creamy, chilled finish.
Main Ingredients
- 14.4 ounces chocolate graham crackers – These form the base and layers of the icebox cake. They soften as the dessert chills and give the cake its familiar texture.
- 2 cups semisweet chocolate chips – These melt into the ganache and create the deep chocolate flavor that makes this chocolate icebox cake recipe so satisfying.
- 0.75 cups heavy cream – Used in the ganache, this helps the chocolate melt smoothly and gives it a silky finish.
- 16 ounces cream cheese, softened – This builds the creamy filling and adds structure, tang, and richness.
- 3 cups heavy cream – Whipped into the filling, this creates a fluffy, cloud-like texture for the no bake cake.
- 1.75 cups powdered sugar – Sweetens the cream filling and helps it whip to stiff peaks.
- 1 teaspoon vanilla extract – Adds warmth and rounds out the flavor of the cream mixture.
- 0.33 cups mini chocolate chips, optional – These add a little crunch on top and make the finished dessert look extra inviting.
Special Dietary Options
- Vegan: Use plant-based cream cheese, coconut cream instead of heavy cream, dairy-free chocolate chips, and vegan graham crackers.
- Gluten-free: Choose gluten-free chocolate crackers or gluten-free chocolate cookies in place of standard graham crackers.
- Low-calorie: Use reduced-fat cream cheese, a lighter whipped topping, and a smaller amount of chocolate chips if you want a lighter refrigerator cake.
If you like creamy desserts, you may also want to check out more easy make-ahead dessert recipes on the blog for other simple sweets that work well for busy schedules.
For a closer look at the richness of one key ingredient, this guide from Verywell Fit covers heavy cream nutrition facts and benefits.
How to Prepare the Perfect Icebox Cake: Step-by-Step Guide
This chocolate icebox cake comes together in three main parts: ganache, cream filling, and layering. The process is simple, but a few small details make a big difference in texture and flavor. Set aside a 9×13-inch pan, a saucepan, a large mixing bowl, and an electric mixer before you begin.
First Step: Make the ganache
Place 2 cups semisweet chocolate chips and 0.75 cups heavy cream in a saucepan over medium-low heat. Stir slowly until the chocolate melts and the mixture becomes smooth and glossy. This should take a few minutes, depending on the heat and the size of your saucepan.
Once the ganache is melted, set it aside and let it cool for at least 10 minutes. This matters because hot ganache can melt the cream filling as you layer the dessert. A slightly cooled ganache drizzles better and holds its shape more cleanly.
Second Step: Whip the cream filling
In a large bowl, beat 16 ounces softened cream cheese until smooth. If your cream cheese still feels cold, let it sit at room temperature longer so it blends without lumps. This first mixing step creates the base for the cream filling and keeps the final dessert smooth.
Next, gradually add half of the 3 cups heavy cream and stir until combined. Then add the rest of the heavy cream and beat on medium-high speed until the mixture thickens. Using an electric mixer makes this easier and helps the cream whip properly.
After the mixture begins to thicken, add 1.75 cups powdered sugar and 1 teaspoon vanilla extract. Beat until stiff peaks form. The filling should look fluffy, hold its shape, and feel thick enough to spread without running. If you want a bit of texture, fold in 0.33 cups mini chocolate chips at the end, though they are optional.
Third Step: Build the first layer
Set the bottom of a 9×13-inch pan with chocolate graham crackers from the 14.4 ounces box. Break the crackers as needed so they fit tightly and cover the whole base. Spacing them evenly helps the layers look neat and slice well later.
Spread one-third of the cream mixture over the crackers in an even layer. Use a spatula to reach the corners and create a smooth surface. Then drizzle one-third of the ganache across the top. It does not need to be perfect, since the chocolate will blend beautifully as the dessert chills.
Fourth Step: Repeat the layers
Add another layer of chocolate graham crackers, then another one-third of the cream mixture, followed by another one-third of the ganache. Repeat this once more so you have three layers of crackers, cream, and chocolate in total. This is what gives the dessert its classic icebox cake structure.
As you layer, keep the crackers as even as possible. If needed, break pieces to fill small gaps. That simple step helps the dessert hold together and gives each slice a more polished look.
Final Step: Finish and chill
Spread the remaining cream mixture on top and drizzle with the remaining ganache. If you are using mini chocolate chips, sprinkle them over the top for extra texture and a bakery-style finish. Cover the pan and refrigerate for at least 4 hours.
For the best result, chill it even longer if you can. Four hours is the minimum, but overnight gives the crackers more time to soften into a cake-like texture. This is one of the biggest reasons people love a refrigerator cake like this one.
Best tip: Give the dessert time to rest in the fridge. That chill time turns simple layers into a creamy, sliceable chocolate icebox cake.

Dietary Substitutions to Customize Your Icebox Cake
Protein and Main Component Alternatives
Even though this recipe is already easy to adapt, you may want to tweak it for dietary needs or whatever you have in the kitchen. The main building blocks are flexible, so the dessert can still work well with smart swaps.
- For the crackers: Use regular graham crackers, chocolate wafer cookies, or even crisp gluten-free cookies if you need a different base.
- For the cream cheese: Try a dairy-free cream cheese alternative if you want a vegan version.
- For the heavy cream: Coconut cream can work in some plant-based versions, though the texture may be a little softer.
- For the chocolate chips: Pick dairy-free semisweet chips or dark chocolate chips if you want a richer or dairy-free filling.
Vegetable, Sauce, and Seasoning Modifications
This dessert does not use vegetables, but you can still change the flavor profile in fun ways. A little adjustment can make the same icebox cake feel brand new.
- Flavor swaps: Add almond extract instead of vanilla for a deeper flavor or use peppermint extract for a holiday version.
- Chocolate style: Use milk chocolate chips for a sweeter ganache or dark chocolate chips for a more intense taste.
- Topping ideas: Try crushed cookies, shaved chocolate, chopped nuts, or sliced strawberries on top.
These changes keep the dessert easy while giving you room to match the season, your crowd, or your own taste preferences.
Mastering Icebox Cake: Advanced Tips and Variations
Once you make this dessert once, it is easy to see why icebox cake has stayed popular for so long. A few advanced tricks can help you get cleaner slices, better texture, and a more polished finish.
Pro cooking techniques
- Use an electric mixer when whipping the 3 cups heavy cream so the filling reaches stiff peaks faster and more evenly.
- Cool the ganache for at least 10 minutes before drizzling it over the cream layers.
- Break crackers into smaller pieces where needed so the layers fit tightly and do not leave big gaps.
- Chill the cake long enough for the crackers to soften fully. This is what creates the classic refrigerator cake texture.
Flavor variations
You can change the flavor without changing the core method. Try a peanut butter drizzle, a mint-flavored ganache, or a layer of crushed peppermint candies during the holidays. For a more classic feel, keep the recipe as written and let the chocolate graham crackers do the heavy lifting.
Presentation tips
For a cleaner look, serve the cake in neat squares and wipe the knife between cuts. A few mini chocolate chips, a dusting of cocoa powder, or some chocolate curls on top can make each slice look party-ready. If you are serving guests, chill the dessert in the same pan you plan to serve from for easier handling.
Make-ahead options
This easy no bake dessert is a strong make-ahead choice. You can prepare it 3 to 5 days in advance and keep it in the refrigerator until serving time. That makes it a great fit for holidays, family dinners, and events where you want one less thing to do on the day itself.
How to Store Icebox Cake: Best Practices
Storing this icebox cake the right way helps keep the texture creamy and the layers neat. Since it is a refrigerator cake, cold storage matters more than anything else.
Refrigeration
Keep the cake covered in the fridge for up to 3 to 5 days. If possible, store it in the same pan and cover it tightly with plastic wrap or a lid. The crackers will continue softening, so the dessert often tastes even better on day two.
Freezing
You can freeze a fully assembled icebox cake for longer storage. Wrap it tightly in plastic wrap and then foil, and freeze for up to 2 months. Thaw it in the refrigerator overnight before serving. Freezing works best with this simple cream and chocolate version.
Reheating
This dessert does not need reheating. In fact, warming it would ruin the texture. Keep it cold so the layers stay firm, creamy, and sliceable.
Meal prep considerations
If you are planning for a party or family event, make it 1 to 2 days ahead for easy serving. The longer chill time helps the chocolate graham crackers soften and makes the dessert easier to slice. According to the recipe notes, it can also be made 3 to 5 days in advance and stored in the refrigerator.

FAQs: Frequently Asked Questions About Icebox Cake
What is icebox cake?
How do you make icebox cake at home?
What cookies work best for icebox cake?
How long does icebox cake need to chill?
Can you make icebox cake ahead and freeze it?

Icebox Cake
🍫 Dive into layers of velvety cream cheese filling, silky ganache, and chocolate graham crackers that soften into cake – ultimate no-bake chocolate indulgence!
🧊 Make-ahead magic ready in minutes of prep, serves a crowd, stays fresh for days in the fridge for stress-free entertaining.
- Total Time: 4 hours 45 minutes
- Yield: 12 servings
Ingredients
– 14.4 ounces chocolate graham crackers for base and layers
– 2 cups semisweet chocolate chips for ganache
– 0.75 cups heavy cream for ganache
– 16 ounces cream cheese, softened for creamy filling
– 3 cups heavy cream for whipped filling
– 1.75 cups powdered sugar for sweetening cream filling
– 1 teaspoon vanilla extract for flavor
– 0.33 cups mini chocolate chips, optional for topping crunch
Instructions
1-First Step: Make the ganache Place 2 cups semisweet chocolate chips and 0.75 cups heavy cream in a saucepan over medium-low heat. Stir slowly until the chocolate melts and the mixture becomes smooth and glossy. This should take a few minutes, depending on the heat and the size of your saucepan. Once the ganache is melted, set it aside and let it cool for at least 10 minutes. This matters because hot ganache can melt the cream filling as you layer the dessert. A slightly cooled ganache drizzles better and holds its shape more cleanly.
2-Second Step: Whip the cream filling In a large bowl, beat 16 ounces softened cream cheese until smooth. If your cream cheese still feels cold, let it sit at room temperature longer so it blends without lumps. This first mixing step creates the base for the cream filling and keeps the final dessert smooth. Next, gradually add half of the 3 cups heavy cream and stir until combined. Then add the rest of the heavy cream and beat on medium-high speed until the mixture thickens. Using an electric mixer makes this easier and helps the cream whip properly. After the mixture begins to thicken, add 1.75 cups powdered sugar and 1 teaspoon vanilla extract. Beat until stiff peaks form. The filling should look fluffy, hold its shape, and feel thick enough to spread without running. If you want a bit of texture, fold in 0.33 cups mini chocolate chips at the end, though they are optional.
3-Third Step: Build the first layer Set the bottom of a 9×13-inch pan with chocolate graham crackers from the 14.4 ounces box. Break the crackers as needed so they fit tightly and cover the whole base. Spacing them evenly helps the layers look neat and slice well later. Spread one-third of the cream mixture over the crackers in an even layer. Use a spatula to reach the corners and create a smooth surface. Then drizzle one-third of the ganache across the top. It does not need to be perfect, since the chocolate will blend beautifully as the dessert chills.
4-Fourth Step: Repeat the layers Add another layer of chocolate graham crackers, then another one-third of the cream mixture, followed by another one-third of the ganache. Repeat this once more so you have three layers of crackers, cream, and chocolate in total. This is what gives the dessert its classic icebox cake structure. As you layer, keep the crackers as even as possible. If needed, break pieces to fill small gaps. That simple step helps the dessert hold together and gives each slice a more polished look.
5-Final Step: Finish and chill Spread the remaining cream mixture on top and drizzle with the remaining ganache. If you are using mini chocolate chips, sprinkle them over the top for extra texture and a bakery-style finish. Cover the pan and refrigerate for at least 4 hours. For the best result, chill it even longer if you can. Four hours is the minimum, but overnight gives the crackers more time to soften into a cake-like texture. This is one of the biggest reasons people love a refrigerator cake like this one.
Last Step:
Please leave a rating and comment letting us know how you liked this recipe! This helps our business to thrive and continue providing free, high-quality recipes for you.Notes
🔌 Use an electric mixer to whip the heavy cream to perfect stiff peaks effortlessly.
⏳ Let ganache cool 10+ minutes before drizzling to prevent melting the cream layers.
❄️ Make 3-5 days ahead; it gets even better as flavors meld in the fridge.
- Prep Time: 45 minutes
- Chilling: 4 hours
- Category: Desserts
- Method: No-Bake
- Cuisine: American
- Diet: Vegetarian
Nutrition
- Serving Size: 1 slice
- Calories: 872 kcal
- Sugar: 43g
- Sodium: 209mg
- Fat: 71g
- Saturated Fat: 42g
- Unsaturated Fat: 29g
- Trans Fat: 0g
- Carbohydrates: 54g
- Fiber: 3g
- Protein: 8g
- Cholesterol: 195mg


