Why You’ll Love This Halloween Candy
Halloween Candy brings big fun to parties, school events, movie nights, and last-minute treats for guests. It is colorful, easy to portion, and simple to mix into recipes that feel festive without a lot of work. If you want a sweet idea that fits busy schedules, this is a strong pick for home cooks, parents, students, and party hosts.
- Easy to prepare: Halloween Candy recipes can come together fast with miniatures, kisses, bars, candy corn, gummies, and coated candies. No fancy tools are needed, so you can make a spooky treat tray, snack mix, or dessert topping in minutes.
- Flexible for many needs: You can swap in peanut butter cups, milk chocolate candies, wafer bars, or fruit-flavored chewy candies based on taste, allergies, or what you already have at home. That makes Halloween Candy a smart choice for mixed groups.
- Fun flavor mix: The mix of chocolate, peanut butter, gelatin-based gummies, sugar candy, and fruit extracts gives each bite a sweet, chewy, crunchy feel. It is the kind of treat people notice right away.
- Great for sharing: Halloween Candy works well in bowls, jars, lunchbox treats, dessert boards, and party bags. It is an easy crowd-pleaser for kids and adults.
When you want a fast party win, Halloween Candy is one of the easiest ways to make the table look festive and feel special.
For more snack and sweet ideas, check out KitchenCC recipe ideas.
Jump to:
- Why You’ll Love This Halloween Candy
- Essential Ingredients for Halloween Candy
- Special Dietary Options
- How to Prepare the Perfect Halloween Candy: Step-by-Step Guide
- First Step: Set up your candy station
- Second Step: Chop the larger candies
- Third Step: Mix the base ingredients
- Fourth Step: Add a light coating if you want a snack mix style treat
- Fifth Step: Chill until set
- Sixth Step: Portion for parties or gifts
- Seventh Step: Add final touches
- Dietary Substitutions to Customize Your Halloween Candy
- Protein and Main Component Alternatives
- Vegetable, Sauce, and Seasoning Modifications
- Mastering Halloween Candy: Advanced Tips and Variations
- Pro cooking techniques
- Flavor variations
- Presentation tips
- Make-ahead options
- How to Store Halloween Candy: Best Practices
- FAQs: Frequently Asked Questions About Halloween Candy
- Halloween Candy
- Ingredients
- Instructions
- Last Step:
- Notes
- Nutrition
- Did you make this recipe?
Essential Ingredients for Halloween Candy
This Halloween Candy recipe uses a mix of classic store-bought treats and simple add-ins. The measurements below help you build a big batch that works for parties, gift bags, or a dessert table.
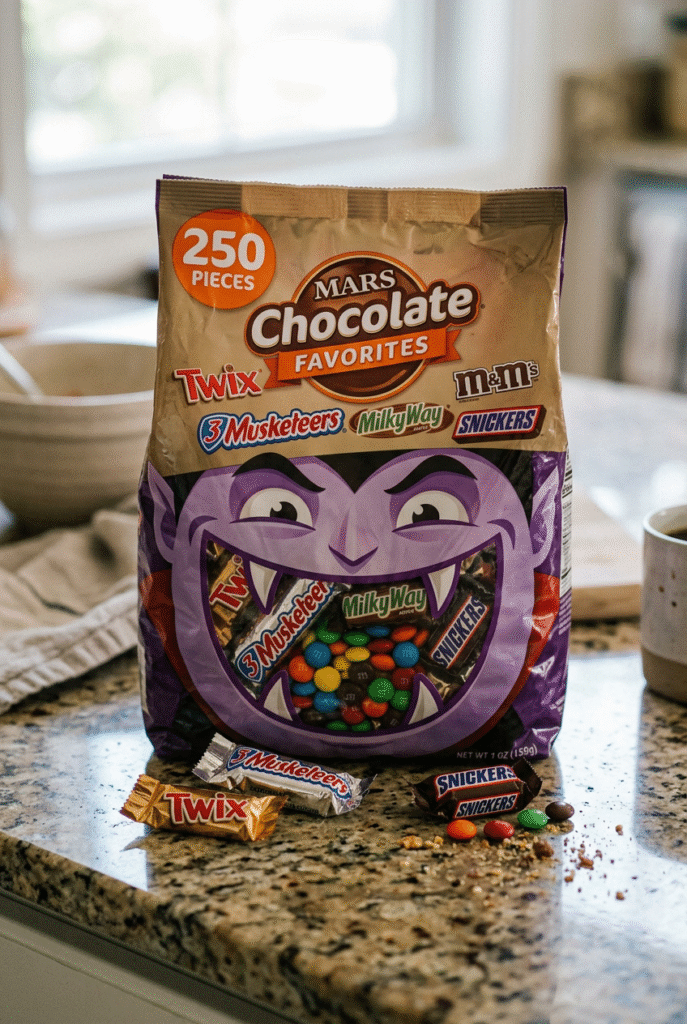
- 2 cups chocolate miniatures – adds a rich base and gives the mix that classic Halloween flavor.
- 1 cup chocolate kisses – brings soft chocolate sweetness and works well in snack mixes or melted drizzle.
- 2 cups assorted chocolate bars, chopped – adds texture and makes the candy mix feel more filling.
- 1 cup peanut butter cups, chopped – brings creamy peanut butter flavor that pairs well with chocolate.
- 1 1/2 cups milk chocolate coated candies – gives a smooth bite and bright color for party bowls.
- 1 cup milk chocolate truffles, chopped – adds a softer, richer chocolate layer.
- 2 cups candy corn – adds chewy sweetness and the classic Halloween look.
- 1 1/2 cups gummy bears – uses gelatin-based candy for a chewy, fun texture.
- 1 1/2 cups gummy pumpkins – keeps the spooky theme strong and adds a playful shape.
- 1 1/2 cups jelly beans – adds sugar-based sweetness and a fruity bite.
- 1 cup hard candies, crushed – adds sparkle, crunch, and extra sweetness.
- 1 1/2 cups wafer bars, broken into pieces – gives a light crisp texture.
- 2 tablespoons fruit extract or fruit candy flavoring – boosts flavor in chewy candies or candy coatings.
- 1/2 teaspoon salt – balances the sweetness and helps the chocolate taste richer.
Special Dietary Options
- Vegan: Use dairy-free chocolate miniatures, vegan chocolate bars, plant-based peanut butter cups, vegan gummies, and vegan wafer bars.
- Gluten-free: Choose certified gluten-free chocolate, candy corn, gummies, jelly beans, and wafer bars.
- Low-calorie: Use smaller portions, sugar-free hard candies, and more fruit extract for flavor without extra bulk.
For a fuller picture of candy nutrition, see this Halloween candy nutrient chart.
How to Prepare the Perfect Halloween Candy: Step-by-Step Guide
First Step: Set up your candy station
Start by clearing a large counter space and gathering bowls, measuring cups, a cutting board, a sharp knife, parchment paper, a baking sheet, and a large mixing bowl. Line the baking sheet with parchment so the candy mixture does not stick later. If you are making this for kids, keep the chopping step for the adults and let the kids help with mixing and arranging. This first step makes the rest of the Halloween Candy process feel easy and organized.
Second Step: Chop the larger candies
Cut the chocolate bars, peanut butter cups, milk chocolate truffles, and wafer bars into bite-size pieces. Keep the chocolate miniatures and kisses whole unless they are very large. Smaller pieces help the mix stay balanced, so every scoop has a good mix of chocolate, peanut butter, and crunchy candy. If you need a nut-free version, swap peanut butter cups for nut-free chocolate creams or extra chocolate bars.
Third Step: Mix the base ingredients
Add the chocolate miniatures, kisses, chopped bars, peanut butter cups, coated candies, truffles, candy corn, gummy bears, gummy pumpkins, jelly beans, crushed hard candies, and wafer pieces to the large bowl. Sprinkle in the salt and fruit extract or fruit candy flavoring. Stir gently so the gummies stay whole and the chocolate does not crumble too much. The goal is a bright Halloween Candy mix with a wide range of textures.
Fourth Step: Add a light coating if you want a snack mix style treat
If you want the candies to hold together a little more, melt 1 cup of chocolate miniatures or chopped bars in a microwave-safe bowl. Heat in 20-second bursts, stirring each time, until smooth. Drizzle the melted chocolate over the mix and toss lightly. Spread the mixture on the parchment-lined baking sheet. For a dairy-free version, use vegan chocolate and make the same melt-and-drizzle method.
Fifth Step: Chill until set
Place the baking sheet in the refrigerator for about 20 to 30 minutes, or until the chocolate drizzle firms up. If you are not using melted chocolate, you can skip this step and move straight to serving. Chilling helps the pieces set into clusters, which is great for party bowls and treat bags.
Sixth Step: Portion for parties or gifts
Once set, break the mix into clusters or spoon it into cups, bowls, or bags. This Halloween Candy recipe is easy to portion for classroom parties, office snacks, or movie night trays. If you are packing it for students or busy parents, keep portions small so it travels well and stays neat.
Seventh Step: Add final touches
Top with a few extra candy corn pieces, crushed hard candy, or a couple of whole kisses for a nice finish. You can also add a small pinch of flaky salt if you want more contrast with the sweetness. Serve right away or store for later. The mix should look colorful, playful, and ready for the spooky season.
Best tip: keep the candy pieces in different sizes. That gives your Halloween Candy more crunch, more chew, and a better bite in every handful.

Dietary Substitutions to Customize Your Halloween Candy
Protein and Main Component Alternatives
If you want a different base, swap the chocolate miniatures, kisses, bars, or truffles for dairy-free chocolate pieces, seed butter cups, or nut-free caramel-style candies. For a higher protein feel, serve the Halloween Candy mix with roasted chickpeas on the side or add a few yogurt-covered treats if dairy works for your group. Busy parents and party hosts often like to mix two or three bases so guests can pick what they like.
For a lighter version, use smaller amounts of peanut butter cups and candy bars, then add more gummy pumpkins, wafer bar pieces, or fruit-flavored chewy candies. If you are serving seniors or diet-conscious individuals, keep portions modest and focus on a mix that has flavor without too much volume.
Vegetable, Sauce, and Seasoning Modifications
This recipe is candy-focused, so the main changes come from flavorings and coatings. Add cinnamon, vanilla, or fruit extract to shift the taste from plain sweet to bright and festive. You can also use a thin yogurt drizzle, dairy-free chocolate drizzle, or a sugar-free chocolate topping if you want a different finish. For a salty-sweet twist, add pretzel bits, pumpkin seeds, or roasted sunflower seeds to the mix.
If you want a more seasonal feel, use orange and black candy colors, or serve the mix in cups lined with Halloween-themed paper. The base recipe is easy to adjust for gluten-free, vegan, and lower-sugar needs without losing the fun.
Mastering Halloween Candy: Advanced Tips and Variations
Pro cooking techniques
Keep the chocolate pieces separate from the gummy candy until the very end if you want the best texture. This keeps the gummies from sticking and helps the chocolate stay clean and neat. If you melt chocolate for drizzling, use low heat and stir often. A smooth melt gives the Halloween Candy mix a polished look.
Flavor variations
Try adding crushed peppermint, pumpkin spice, orange extract, or caramel bits for a new twist. You can also swap some of the milk chocolate candies for dark chocolate if you want a deeper taste. If you like more fruit flavor, use fruit extract in the hard candies or chewy candies for a bright bite.
Presentation tips
Serve the candy in mini cups, jars, clear bags, or a large black bowl for a spooky look. Layer the colors so the candy corn, gummy pumpkins, and chocolate pieces stand out. A few whole kisses on top can make the bowl look fuller and more festive.
Make-ahead options
You can make this Halloween Candy mix up to 5 days ahead if you store it properly. Keep the chocolate and gummies cool and dry, then combine them just before serving if you want the freshest texture. For parties, portion the candy into bags the day before so you can hand them out fast.
How to Store Halloween Candy: Best Practices
Store Halloween Candy in an airtight container at room temperature for up to 1 week if the room is cool and dry. Keep it away from direct sunlight so the chocolate does not melt and the gummies do not stick together. If your kitchen runs warm, place the container in the refrigerator for short-term storage.
For longer storage, freeze the candy mix in a freezer-safe bag or container for up to 2 months. Separate layers with parchment paper if you want to protect the shape of the chocolate pieces and bars. Thaw in the fridge before serving so condensation does not make the candy sticky.
Reheating is not usually needed for this recipe. If you used a chocolate drizzle and want to soften it, let the candy sit at room temperature for 10 to 15 minutes. For meal prep, portion Halloween Candy into small bags ahead of time so busy weeks and party days feel easier.

FAQs: Frequently Asked Questions About Halloween Candy
Print
Halloween Candy
👻 Whip up bulk Spooky Chocolate Candy Clusters packed with Halloween favorites like candy corn, peanut butter cups, and gummies – effortless treats for parties and trick-or-treat bags!
🎃 Customizable with any bulk candies, no-bake simplicity yields dozens quickly, perfect for sharing festive fun without fuss.
- Total Time: 40 minutes
- Yield: 40 clusters
Ingredients
– 2 cups chocolate miniatures – adds a rich base and gives the mix that classic Halloween flavor.
– 1 cup chocolate kisses – brings soft chocolate sweetness and works well in snack mixes or melted drizzle.
– 2 cups assorted chocolate bars, chopped – adds texture and makes the candy mix feel more filling.
– 1 cup peanut butter cups, chopped – brings creamy peanut butter flavor that pairs well with chocolate.
– 1 1/2 cups milk chocolate coated candies – gives a smooth bite and bright color for party bowls.
– 1 cup milk chocolate truffles, chopped – adds a softer, richer chocolate layer.
– 2 cups candy corn – adds chewy sweetness and the classic Halloween look.
– 1 1/2 cups gummy bears – uses gelatin-based candy for a chewy, fun texture.
– 1 1/2 cups gummy pumpkins – keeps the spooky theme strong and adds a playful shape.
– 1 1/2 cups jelly beans – adds sugar-based sweetness and a fruity bite.
– 1 cup hard candies, crushed – adds sparkle, crunch, and extra sweetness.
– 1 1/2 cups wafer bars, broken into pieces – gives a light crisp texture.
– 2 tablespoons fruit extract or fruit candy flavoring – boosts flavor in chewy candies or candy coatings.
– 1/2 teaspoon salt – balances the sweetness and helps the chocolate taste richer.
Instructions
1-First Step: Set up your candy station Start by clearing a large counter space and gathering bowls, measuring cups, a cutting board, a sharp knife, parchment paper, a baking sheet, and a large mixing bowl. Line the baking sheet with parchment so the candy mixture does not stick later. If you are making this for kids, keep the chopping step for the adults and let the kids help with mixing and arranging. This first step makes the rest of the Halloween Candy process feel easy and organized.
2-Second Step: Chop the larger candies Cut the chocolate bars, peanut butter cups, milk chocolate truffles, and wafer bars into bite-size pieces. Keep the chocolate miniatures and kisses whole unless they are very large. Smaller pieces help the mix stay balanced, so every scoop has a good mix of chocolate, peanut butter, and crunchy candy. If you need a nut-free version, swap peanut butter cups for nut-free chocolate creams or extra chocolate bars.
3-Third Step: Mix the base ingredients Add the chocolate miniatures, kisses, chopped bars, peanut butter cups, coated candies, truffles, candy corn, gummy bears, gummy pumpkins, jelly beans, crushed hard candies, and wafer pieces to the large bowl. Sprinkle in the salt and fruit extract or fruit candy flavoring. Stir gently so the gummies stay whole and the chocolate does not crumble too much. The goal is a bright Halloween Candy mix with a wide range of textures.
4-Fourth Step: Add a light coating if you want a snack mix style treat If you want the candies to hold together a little more, melt 1 cup of chocolate miniatures or chopped bars in a microwave-safe bowl. Heat in 20-second bursts, stirring each time, until smooth. Drizzle the melted chocolate over the mix and toss lightly. Spread the mixture on the parchment-lined baking sheet. For a dairy-free version, use vegan chocolate and make the same melt-and-drizzle method.
5-Fifth Step: Chill until set Place the baking sheet in the refrigerator for about 20 to 30 minutes, or until the chocolate drizzle firms up. If you are not using melted chocolate, you can skip this step and move straight to serving. Chilling helps the pieces set into clusters, which is great for party bowls and treat bags.
6-Sixth Step: Portion for parties or gifts Once set, break the mix into clusters or spoon it into cups, bowls, or bags. This Halloween Candy recipe is easy to portion for classroom parties, office snacks, or movie night trays. If you are packing it for students or busy parents, keep portions small so it travels well and stays neat.
7-Seventh Step: Add final touches Top with a few extra candy corn pieces, crushed hard candy, or a couple of whole kisses for a nice finish. You can also add a small pinch of flaky salt if you want more contrast with the sweetness. Serve right away or store for later. The mix should look colorful, playful, and ready for the spooky season.
Last Step:
Please leave a rating and comment letting us know how you liked this recipe! This helps our business to thrive and continue providing free, high-quality recipes for you.Notes
🍬 Use melting wafers for smoothest texture that sets quickly without tempering.
❄️ Chill promptly to prevent gummies from melting into the chocolate.
📦 Package in cellophane bags with ribbons for easy bulk distribution at parties.
- Prep Time: 10 minutes
- Chilling: 30 minutes
- Category: Desserts
- Method: No-Bake
- Cuisine: American
- Diet: Vegetarian
Nutrition
- Serving Size: 1 cluster
- Calories: 120 kcal
- Sugar: 14g
- Sodium: 40mg
- Fat: 6g
- Saturated Fat: 3g
- Unsaturated Fat: 2.5g
- Trans Fat: 0g
- Carbohydrates: 17g
- Fiber: 1g
- Protein: 2g
- Cholesterol: 5mg


