Ingredients
– Cooking spray for clean release from the pan
– 6 ounces vanilla wafer cookies, about 50 cookies for sweet, cookie-style base
– 2 tablespoons granulated sugar for extra sweetness
– 6 tablespoons melted unsalted butter for binding cookie crumbs
– Two 3.4-ounce boxes vanilla instant pudding mix for smooth custard layer
– 2 1/2 cups cold heavy cream for thick, airy filling
– 6 ounces chopped semi-sweet chocolate, or 1 cup semi-sweet chocolate chips for rich, glossy topping
– 2/3 cup cold heavy cream for silky ganache
Instructions
1-First Step: Prepare the pan and crust Start by lining a 9×13-inch baking pan with cooking spray. This helps the bars lift out later without sticking. If you want even cleaner slices, line the pan with parchment paper first, then spray it lightly. Next, crush the vanilla wafer cookies into fine crumbs. You can use a food processor for a quick result or place the cookies in a zip-top bag and crush them with a rolling pin. Stir the crumbs with the granulated sugar, then add the melted unsalted butter. Mix until the crumbs look damp, like wet sand. Press the mixture firmly into the bottom of the pan. A flat measuring cup works well for this. Pack it down evenly so the crust stays together after chilling. Since this is a no bake recipe, the crust needs a solid press to hold its shape.
2-Second Step: Make the vanilla filling In a large bowl, whisk the two boxes of vanilla instant pudding mix with the cold heavy cream. Whisk until the mixture thickens, then keep whisking for another minute or two so the texture turns smooth and creamy. The filling should be thick enough to spread, not runny. If you want the creamiest result, use very cold heavy cream and a chilled mixing bowl. This helps the pudding set faster and gives the bars a light, mousse-like feel. For a stronger vanilla taste, you can add a small splash of vanilla extract if your pantry allows it, though the recipe works well without it.
3-Third Step: Spread the custard layer Spoon the vanilla filling over the crust and spread it into an even layer. Take your time here, because an even filling makes the final bars easier to slice. A rubber spatula or offset spatula helps smooth the top without disturbing the crust. Once the custard layer is in place, place the pan in the refrigerator for at least 30 to 45 minutes. This short chill helps the filling firm up before you add the ganache. If you are making the bars for a party, this step can be done earlier in the day while you prep other dishes.
4-Fourth Step: Make the chocolate ganache Put the chopped semi-sweet chocolate or chocolate chips into a heat-safe bowl. Heat the 2/3 cup cold heavy cream until it is hot but not boiling, then pour it over the chocolate. Let it sit for a minute so the chocolate starts to melt. After that, stir gently until the mixture becomes smooth and glossy. This ganache is what gives Boston Cream Pie Bars their classic finish. If you prefer a deeper chocolate taste, use chopped semi-sweet chocolate instead of chips. The texture will still be silky, but the flavor may feel a little more intense.
5-Fifth Step: Add the ganache and chill Spread the ganache over the chilled custard layer in an even coat. Work from the center outward so the top stays smooth. If the ganache seems too warm, let it cool for a few minutes before spreading so it does not melt the filling. After the top layer is spread, return the pan to the refrigerator. Chill the bars for at least 2 to 4 hours, or until the filling and chocolate top are fully set. For the cleanest cuts, chill them overnight. This is one reason no bake Boston cream pie bars are so handy for planning ahead.
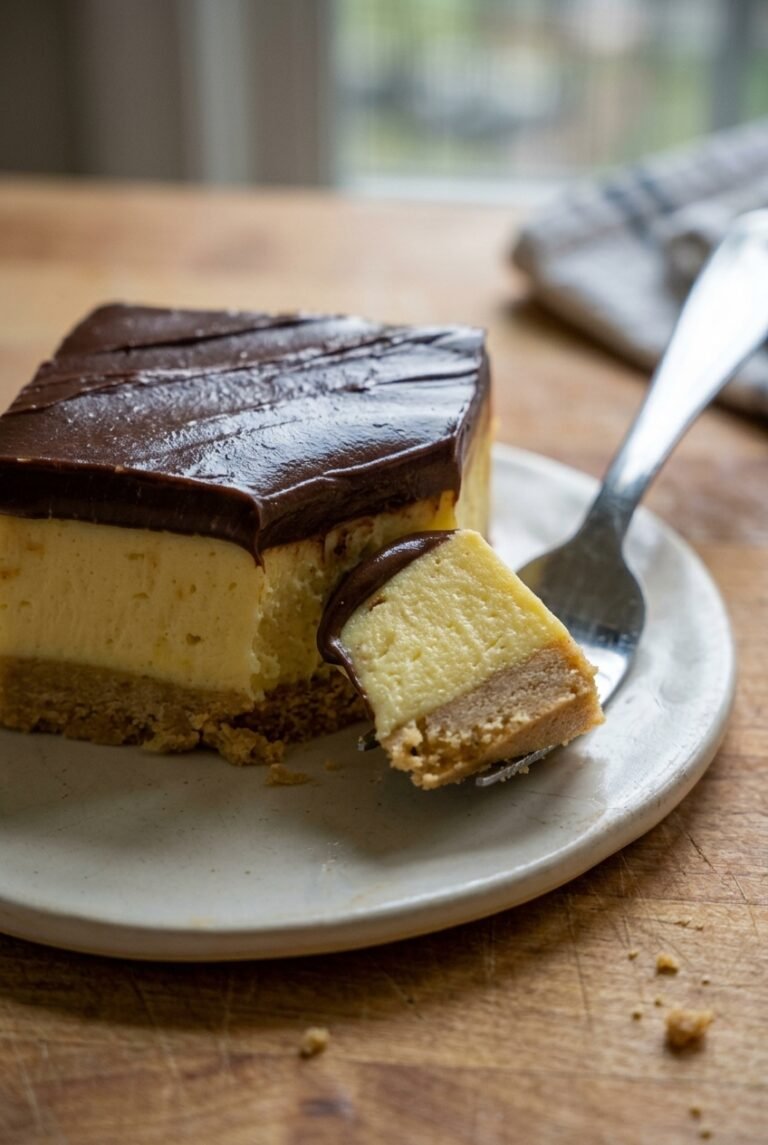
6-Final Step: Slice and serve Once the bars are firm, lift them from the pan if you used parchment paper and place them on a cutting board. Use a sharp knife wiped clean between cuts for neat edges. You can slice them into 12 larger bars or 16 smaller servings depending on the crowd. Serve them cold for the best texture. If you want a little extra style, top each bar with a small dollop of whipped cream or a few chocolate curls. These bars taste like a classic bakery dessert, but they are simple enough for everyday home cooking.
Last Step:
Please leave a rating and comment letting us know how you liked this recipe! This helps our business to thrive and continue providing free, high-quality recipes for you.Notes
🧈 Press crust firmly for sturdy base that holds up to creamy layers.
⏳ Chill each layer separately for best texture – overnight ideal.
🍫 Use high-quality chocolate for ganache that sets shiny and snaps.
- Prep Time: 20 minutes
- Chilling: 4 hours
- Category: Desserts
- Method: No-Bake
- Cuisine: American
- Diet: Vegetarian
Nutrition
- Serving Size: 1 bar
- Calories: 378 kcal
- Sugar: 22g
- Sodium: 250mg
- Fat: 27g
- Saturated Fat: 15g
- Unsaturated Fat: 11g
- Trans Fat: 0g
- Carbohydrates: 32g
- Fiber: 1g
- Protein: 3g
- Cholesterol: 70mg