Why You’ll Love This Beaver Tails
Beaver Tails are a fun, crispy homemade pastry that captures the heart of Canadian traditions with every bite. Imagine warm, fresh dough fried to perfection and topped just how you like it, making it a go-to treat for sharing with family and friends. This beaver tails recipe stands out for its simple prep and big flavors, perfect for busy parents or baking enthusiasts looking to add a touch of joy to their day.
One of the best parts about this beaver tails pastry is how it brings people together, much like the hearty treats that celebrate joyful moments. Whether you’re craving something sweet or savory, these fried dough delights offer bite-sized versions that are easy to share, along with options like crispy, cheesy poutine for a salty twist. Let’s dive into why this recipe will quickly become your favorite.
- Ease of preparation: Whipping up this beaver tails recipe is straightforward and quick, taking just about 30 minutes from start to finish once your dough is ready. You only need basic kitchen tools and simple steps, making it ideal for students or working professionals who want homemade beaver tails without spending hours in the kitchen. This simplicity lets you focus on the fun of topping them to your preference, like adding cinnamon sugar or other flavors.
- Health benefits: While these crispy homemade beaver tails are a treat, you can adapt them for lighter options, such as using whole wheat flour for added fiber and nutrients. They provide a satisfying energy boost from carbs, and when paired with fresh toppings, they can include elements like fruit for vitamins. This makes the canadian pastry a smarter choice for diet-conscious individuals who still want to enjoy big flavors without overindulging.
- Versatility: This beaver tails fried pastry delight adapts easily to different tastes and needs, from vegan swaps to gluten-free versions, so everyone from travelers to seniors can join in. You might top them with classic cinnamon sugar or mix it up with savory options like a pastry-wrapped snack, and even pair them with cold sips like strawberry lemonade slushie for a refreshing combo. It’s all about creating memorable experiences, whether you’re hosting a party or grabbing a quick bite.
- Distinctive flavor: What sets this homemade beaver tails apart is its warm, fresh taste that’s rooted in Canadian tradition, offering a perfect balance of crispy texture and customizable toppings. Bite into one and you’ll taste the spirit of family gatherings, with options for rich hot chocolate on chilly days or creamy ice cream scoops inspired by the pastries for a sweet finish. These flavors make any moment feel special, turning ordinary snacks into shareable treats with big impact.
Making this beaver tails recipe at home means you can explore variations like smaller boxes of six for easy sharing, all while embracing the joy of online ordering or finding products in nearby shops. Whether you’re new to baking or a pro, this pastry brings smiles and warmth to your table.
Jump to:
- Why You’ll Love This Beaver Tails
- Essential Ingredients for Beaver Tails
- Main Ingredients
- Special Dietary Options
- How to Prepare the Perfect Beaver Tails: Step-by-Step Guide
- First Step: Gather and Mix the Dough
- Second Step: Let the Dough Rise
- Third Step: Shape the Pastries
- Fourth Step: Fry to Golden Perfection
- Fifth Step: Add Toppings and Serve
- Dietary Substitutions to Customize Your Beaver Tails
- Protein and Main Component Alternatives
- Vegetable, Sauce, and Seasoning Modifications
- Mastering Beaver Tails: Advanced Tips and Variations
- How to Store Beaver Tails: Best Practices
- FAQs: Frequently Asked Questions About Beaver Tails
- Beaver Tails
- Ingredients
- Instructions
- Last Step:
- Notes
- Nutrition
- Did you make this recipe?
Essential Ingredients for Beaver Tails
Gathering the right ingredients is key to creating authentic canadian beaver tails pastry that fries up crispy and delicious. Below, you’ll find a detailed list of everything needed for this easy beaver tails recipe, with precise measurements and explanations to help you understand each one’s role.
Main Ingredients
- 2 cups all-purpose flour – Forms the base of the dough, providing structure and a soft texture when fried.
- 1 teaspoon active dry yeast – Helps the dough rise, giving the beaver tails their light and fluffy interior.
- 1 tablespoon granulated sugar – Adds a touch of sweetness and feeds the yeast for better rising.
- 1 teaspoon salt – Balances the flavors and enhances the overall taste of the fried dough.
- 3/4 cup warm water – Activates the yeast and hydrates the dough for easy mixing and shaping.
- 2 tablespoons vegetable oil – Keeps the dough moist and aids in achieving a crispy exterior when fried.
- Oil for frying (about 4 cups) – Used for deep-frying to ensure the pastries cook evenly and turn golden brown.
Special Dietary Options
- Vegan: Swap the all-purpose flour for a plant-based version if needed, and use water or plant-based milk instead of any animal-derived ingredients; keep the yeast and sugar as is for the same rise and sweetness.
- Gluten-free: Replace the all-purpose flour with a gluten-free flour blend in the same 2 cups measurement to maintain the dough’s consistency and fried texture.
- Low-calorie: Opt for a reduced-sugar alternative in the 1 tablespoon granulated sugar slot and use less oil for frying to cut down on calories while still enjoying the crispy homemade beaver tails.
These ingredients make for a versatile beaver tails recipe that you can tweak based on what you have on hand, ensuring everyone can enjoy this canadian pastry delight.
How to Prepare the Perfect Beaver Tails: Step-by-Step Guide
Making crispy homemade beaver tails is an adventure that’s simple once you follow these steps. This easy beaver tails recipe will guide you through creating warm, fresh pastries that can be topped to your liking. delicious smoothie recipes could pair well if you’re looking for a refreshing side, but let’s focus on the main event.
First Step: Gather and Mix the Dough
Start by combining 2 cups of all-purpose flour, 1 teaspoon of active dry yeast, 1 tablespoon of granulated sugar, and 1 teaspoon of salt in a large bowl. Add 3/4 cup of warm water and 2 tablespoons of vegetable oil, then mix until a soft dough forms. This step ensures your beaver tails have the right base for that authentic canadian pastry texture, taking about 5 minutes to mix thoroughly.
Second Step: Let the Dough Rise
Once mixed, cover the dough with a clean cloth and let it rise in a warm spot for about 30-45 minutes, or until it doubles in size. This rising process, activated by the yeast, gives the fried dough its light and airy feel, which is key to the beaver tails recipe’s success. Keep an eye on it to adapt for different kitchen temperatures.
Third Step: Shape the Pastries
After rising, punch down the dough and divide it into 6-8 equal pieces on a floured surface. Roll each piece into an oval shape, about 1/4 inch thick, to create the classic beaver tails shape. This shaping step allows for easy customization, like making bite-sized versions for sharing, and works well for those wanting gluten-free adaptations by using the right flour.
Fourth Step: Fry to Golden Perfection
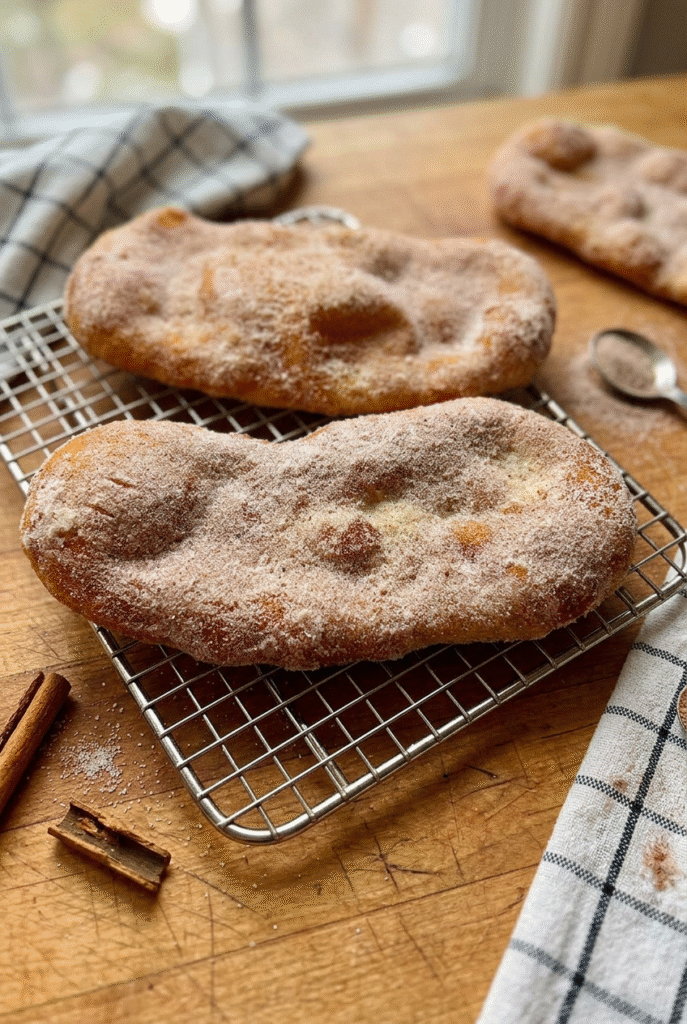
Heat 4 cups of oil in a deep pan to 375°F, then carefully add the shaped dough one at a time, frying for 1-2 minutes per side until golden and crispy. Use a slotted spoon to flip and remove them, draining on paper towels to keep things light. Frying brings out the distinctive flavor of these homemade beaver tails, and you can add savory options like cheesy poutine toppings right after for a twist.
Fifth Step: Add Toppings and Serve
Once fried, let the pastries cool slightly before topping them to customer preference, such as cinnamon sugar or a pastry-wrapped savory snack. For a fun variation, serve with cold sips like classic lemonade or pair with ice cream flavors inspired by the pastries for a sweet scoop. This final step makes your beaver tails fried pastry delight ready to enjoy, taking just a few minutes to assemble.
This process highlights the beaver tails recipe’s adaptability, perfect for busy schedules or dietary needs, and results in treats that embrace Canadian tradition. Remember, smaller versions can be boxed for six, adding to the shareable fun.

Dietary Substitutions to Customize Your Beaver Tails
Protein and Main Component Alternatives
For the main dough in this beaver tails recipe, swap all-purpose flour with almond flour if you’re aiming for a nuttier taste or gluten-free option, keeping the measurement at 2 cups. If yeast isn’t available, try baking powder as a quick alternative, using 2 teaspoons to maintain the rise without changing the crispy texture. These changes make the canadian pastry accessible for various preferences, like those of working professionals needing quick swaps.
Vegetable, Sauce, and Seasoning Modifications
Enhance your beaver tails with veggie toppings like fresh herbs instead of sugar for a savory spin, or use low-sugar sauces for diet-conscious tweaks. For seasonings, swap sugar with spices like cinnamon or add cheese for a crispy, cheesy poutine vibe, adapting to seasonal ingredients. These modifications ensure your homemade beaver tails stay versatile for food enthusiasts experimenting with flavors.
Mastering Beaver Tails: Advanced Tips and Variations
Taking your beaver tails recipe to the next level means trying pro cooking techniques, like maintaining oil at exactly 375°F for the crispiest results in this canadian pastry. refreshing beverage ideas can complement your treats, such as pairing with hot chocolate flavors. Flavor variations include adding fruits for a sweet twist or mixing in herbs for savory bites.
For presentation, arrange them in a box of six for sharing, and consider make-ahead options by pre-shaping dough ahead of time. These tips help you create authentic variations while keeping the spirit of Canadian tradition alive.
How to Store Beaver Tails: Best Practices
Proper storage keeps your homemade beaver tails fresh and tasty for later. For short-term needs, follow these guidelines to maintain quality.
| Storage Method | Details |
|---|---|
| Refrigeration | Store in an airtight container for up to 2 days to keep the crispy texture. |
| Freezing | Wrap individually and freeze for up to 3 months for long-term enjoyment. |
| Reheating | Warm in an oven at 350°F for a few minutes to restore crispiness safely. |
| Meal Prep | Prep batches for events, using truck service options for fresh delivery. |

FAQs: Frequently Asked Questions About Beaver Tails
Print
Beaver Tails
🐿️ Indulge in these crispy homemade BeaverTails, a fried dough delight that’s low-effort for high reward, bringing the joy of Canadian fair food to your kitchen with warm, golden crunch.
🍯 Try this versatile pastry topped with cinnamon sugar or Nutella for family fun, offering a sweet treat that’s shareable, customizable, and evokes nostalgic celebrations with minimal ingredients.
- Total Time: 1 hour 40 minutes
- Yield: 10-12 pastries
Ingredients
– 2 cups all-purpose flour
– 1 teaspoon active dry yeast
– 1 tablespoon granulated sugar
– 1 teaspoon salt
– 3/4 cup warm water
– 2 tablespoons vegetable oil
– about 4 cups oil for frying
Instructions
1-First Step: Gather and Mix the Dough Start by combining 2 cups of all-purpose flour, 1 teaspoon of active dry yeast, 1 tablespoon of granulated sugar, and 1 teaspoon of salt in a large bowl. Add 3/4 cup of warm water and 2 tablespoons of vegetable oil, then mix until a soft dough forms. This step ensures your beaver tails have the right base for that authentic canadian pastry texture, taking about 5 minutes to mix thoroughly.
2-Second Step: Let the Dough Rise Once mixed, cover the dough with a clean cloth and let it rise in a warm spot for about 30-45 minutes, or until it doubles in size. This rising process, activated by the yeast, gives the fried dough its light and airy feel, which is key to the beaver tails recipe’s success. Keep an eye on it to adapt for different kitchen temperatures.
3-Third Step: Shape the Pastries After rising, punch down the dough and divide it into 6-8 equal pieces on a floured surface. Roll each piece into an oval shape, about 1/4 inch thick, to create the classic beaver tails shape. This shaping step allows for easy customization, like making bite-sized versions for sharing, and works well for those wanting gluten-free adaptations by using the right flour.
4-Fourth Step: Fry to Golden Perfection Heat 4 cups of oil in a deep pan to 375°F, then carefully add the shaped dough one at a time, frying for 1-2 minutes per side until golden and crispy. Use a slotted spoon to flip and remove them, draining on paper towels to keep things light. Frying brings out the distinctive flavor of these homemade beaver tails, and you can add savory options like cheesy poutine toppings right after for a twist.
5-Fifth Step: Add Toppings and Serve Once fried, let the pastries cool slightly before topping them to customer preference, such as cinnamon sugar or a pastry-wrapped savory snack. For a fun variation, serve with cold sips like classic lemonade or pair with ice cream flavors inspired by the pastries for a sweet scoop. This final step makes your beaver tails fried pastry delight ready to enjoy, taking just a few minutes to assemble.
Last Step:
Please leave a rating and comment letting us know how you liked this recipe! This helps our business to thrive and continue providing free, high-quality recipes for you.Notes
🌡️ Keep the frying oil at a steady 350°F to achieve that perfect golden crisp without sogginess or burning—use a thermometer for accuracy.
🍯 Experiment with bite-sized versions for parties by cutting dough into smaller pieces, making it easier to share and top with varied flavors like cheese for savory twists.
🕐 Allow full rising time for fluffy interiors; if in a hurry, place the dough in a warm oven (turned off) to speed it up without overproofing.
- Prep Time: 20 minutes
- Rising Time: 1 hour
- Cook Time: 20 minutes
- Category: Dessert
- Method: Deep Frying
- Cuisine: Canadian
- Diet: Vegetarian
Nutrition
- Serving Size: 1 pastry
- Calories: 250 kcal
- Sugar: 8 g
- Sodium: 150 mg
- Fat: 10 g
- Saturated Fat: 3 g
- Unsaturated Fat: 7 g
- Trans Fat: 0 g
- Carbohydrates: 35 g
- Fiber: 1 g
- Protein: 5 g
- Cholesterol: 25 mg


