Why You’ll Love This Icebox Cake
If you are craving a rich Icebox Cake that tastes like a bakery dessert but takes very little hands-on time, this Chocolate Icebox Cake No Bake Recipe is a strong pick. It has that classic no-bake charm, and it fits busy days when you want a sweet treat without turning on the oven.
- Easy to make: This No Bake Cake comes together in about 45 minutes of prep time, then the fridge does the rest. That makes it a smart dessert for home cooks, students, working professionals, and busy parents who want something impressive without a long baking session.
- Great make-ahead dessert: Since the cake needs at least 4 hours in the refrigerator, it is perfect for parties, holidays, and weekly meal planning. You can also make it 3 to 5 days ahead, which is a huge help when life gets busy.
- Rich chocolate flavor: With chocolate graham crackers, silky ganache, and a fluffy cream cheese filling, this Chocolate Icebox Cake delivers big flavor in every slice. It tastes like a cross between a mousse cake and a chilled chocolate layer dessert.
- Flexible for different needs: If chocolate graham crackers are hard to find, you can swap in regular graham crackers or chocolate wafer cookies. That kind of flexibility makes this Icebox Dessert easy to adapt for different kitchens and shopping lists.
For a no-fuss dessert that feels special, this Easy Chocolate Icebox Cake is the kind of recipe people ask for again and again.
If you enjoy simple recipes that still feel party-ready, this one is a keeper. For more sweet inspiration, you might also like our kitchencc.com dessert ideas and other chilled treats. You can also read more about the science behind chocolate on the health benefits of chocolate.
Jump to:
- Why You’ll Love This Icebox Cake
- Essential Ingredients for Icebox Cake
- Main Ingredients
- Quick ingredient notes
- Special dietary options
- How to Prepare the Perfect Icebox Cake: Step-by-Step Guide
- First Step: Make the chocolate ganache
- Second Step: Whip the cream cheese filling
- Third Step: Set up the pan
- Fourth Step: Build the layers
- Final Step: Chill and slice
- Dietary Substitutions to Customize Your Icebox Cake
- Protein and main component alternatives
- Vegetable, sauce, and seasoning modifications
- Mastering Icebox Cake: Advanced Tips and Variations
- Pro cooking techniques
- Flavor variations
- Presentation tips
- Make-ahead options
- How to Store Icebox Cake: Best Practices
- Refrigeration
- Freezing
- Reheating
- Meal prep considerations
- FAQs: Frequently Asked Questions About Icebox Cake
- Icebox Cake
- Ingredients
- Instructions
- Last Step:
- Notes
- Nutrition
- Did you make this recipe?
Essential Ingredients for Icebox Cake
This No Bake Icebox Cake Recipe uses simple ingredients, but each one plays an important role. The crackers give the cake structure, the ganache adds deep chocolate flavor, and the whipped cream cheese filling brings a light, creamy texture that softens beautifully in the fridge.
Main Ingredients
- 14.4 oz box chocolate graham crackers – These form the layered base and soften into cake-like layers after chilling.
- 2 cups semisweet chocolate chips – These create the chocolate ganache topping and add bold, smooth chocolate flavor.
- 0.75 cups heavy cream – This helps melt the chocolate chips into a glossy ganache.
- 16 oz cream cheese, softened – This gives the filling body, tang, and a cheesecake-like richness.
- 3 cups heavy cream – This whips into the fluffy filling and gives the dessert its airy texture.
- 1.75 cups powdered sugar – This sweetens the filling and helps it hold its shape.
- 1 tsp vanilla extract – This adds warmth and rounds out the chocolate flavor.
- 0.33 cup mini chocolate chips, optional – These make a pretty finishing touch and add extra chocolate bites on top.
Quick ingredient notes
| Ingredient | What it does | Simple swap |
|---|---|---|
| Chocolate graham crackers | Create the layered base | Chocolate wafer cookies or regular graham crackers |
| Semisweet chocolate chips | Form the ganache | Dark chocolate chips |
| Cream cheese | Adds richness and structure | Plant-based cream cheese for a dairy-free version |
| Heavy cream | Whips into a fluffy filling | Coconut cream for a vegan-style option |
Special dietary options
- Vegan: Use dairy-free cream cheese, coconut cream, and dairy-free chocolate chips.
- Gluten-free: Choose gluten-free chocolate cookies or gluten-free graham-style crackers.
- Low-calorie: Try reduced-fat cream cheese, a lighter whipped topping, and a smaller amount of chocolate chips.
For a lighter cream option, you may also find this guide useful: heavy cream nutrition facts and health benefits.
How to Prepare the Perfect Icebox Cake: Step-by-Step Guide
This Chocolate Icebox Cake is simple, but the little details matter. If you whip the cream well, let the ganache cool, and give the cake enough time to chill, you will get clean slices and a soft, creamy texture that holds together nicely.
First Step: Make the chocolate ganache
Place 2 cups semisweet chocolate chips and 0.75 cups heavy cream in a saucepan over medium-low heat. Stir often as the chocolate melts into the cream. Keep stirring until the mixture is smooth and glossy, then remove it from the heat. Let it cool for at least 10 minutes before you use it. This helps keep the cream filling from melting when you drizzle the ganache.
Second Step: Whip the cream cheese filling
Add 16 oz softened cream cheese to a large mixing bowl and beat it until smooth. This is where an electric mixer really helps, especially if you want a silky filling with no lumps. Next, gradually add half of the 3 cups heavy cream and stir it in. After that, add the remaining heavy cream and beat until the mixture thickens.
Now add 1.75 cups powdered sugar and 1 tsp vanilla extract. Beat again until the filling reaches stiff peaks. The texture should be thick, fluffy, and easy to spread. If you want a slightly lighter dessert, you can fold in a little extra whipped cream topping, but the recipe works best as written.
Third Step: Set up the pan
Use a 9×13 pan for the best layer size. Line up your chocolate graham crackers so they cover the bottom in one even layer. Break a few crackers if needed so the whole pan is covered. The goal is a full base with as few gaps as possible.
Fourth Step: Build the layers
Spread one-third of the cream mixture over the crackers. Try to smooth it out gently so the filling reaches the corners. Then drizzle one-third of the cooled ganache over the cream. Repeat the layering process two more times. You should end with the last portion of the cream mixture on top, followed by the remaining ganache.
If you are using them, sprinkle 0.33 cup mini chocolate chips over the top. They add a nice finish and make the dessert look extra inviting. This step is optional, but it gives the cake a little crunch and a bakery-style look.
Final Step: Chill and slice
Cover the pan and refrigerate the cake for at least 4 hours. This resting time is important because the crackers soften and the layers set. If you can leave it overnight, even better. Once chilled, cut the cake into 9 slices and serve cold.
The biggest secret to a good No Bake Chocolate Cake Recipe is patience. The fridge does the hard work, and the layers taste better after they have time to settle.
Preparation time: 45 minutes
Total time: 45 minutes plus chilling time
Serves: 9 slices

Dietary Substitutions to Customize Your Icebox Cake
Protein and main component alternatives
Even though this is a dessert and not a protein-based dish, the main ingredients can still be adjusted for different needs. If you need a lighter version, use reduced-fat cream cheese and a lighter whipped topping. For a dairy-free version, choose plant-based cream cheese and coconut cream in place of the heavy cream.
If chocolate graham crackers are not available, regular graham crackers work well. Chocolate wafer cookies are another smart swap and often create a deeper chocolate flavor. These substitutions keep the Icebox Dessert style intact while making the recipe easier to shop for.
Vegetable, sauce, and seasoning modifications
This recipe does not include vegetables, but you can still play with flavor and texture. Try adding a pinch of espresso powder to the ganache for a richer chocolate taste. You can also fold a little orange zest into the filling for a bright, fresh note. If you like mint, a few drops of peppermint extract can turn the dessert into a holiday-style treat.
For topping ideas, consider crushed cookies, chopped nuts, or a light dusting of cocoa powder. These small changes give your Chocolate Icebox Cake a new look without changing the easy no-bake method.
Mastering Icebox Cake: Advanced Tips and Variations
Pro cooking techniques
Use an electric mixer for the filling so the cream cheese becomes smooth and the whipped cream has enough volume. If you are whipping by hand, it will still work, but it takes more effort. Another smart move is to chill your mixing bowl for a few minutes before whipping the cream. That helps the mixture thicken faster.
Let the ganache cool for at least 10 minutes before drizzling it over the layers. If it is too warm, it may slide into the filling or soften the crackers too much. A slightly cooled ganache gives you neater layers and better slices later.
Flavor variations
You can turn this Easy Chocolate Icebox Cake into a cookies and cream style dessert by adding crushed chocolate sandwich cookies between layers. You could also swap semisweet chips for dark chocolate chips if you like a stronger chocolate taste. For a sweeter finish, drizzle caramel over the top before serving.
Presentation tips
For a pretty final look, pipe a little extra whipped cream around the edges before adding the mini chocolate chips. A few chocolate curls or shaved chocolate pieces can also make the dessert feel party-ready. If you are serving guests, cut the slices with a warm knife for cleaner edges.
Make-ahead options
This dessert is ideal for planning ahead. In fact, it often tastes better after resting overnight because the layers soften and blend together. You can make it 3 to 5 days in advance, which makes it a smart choice for birthdays, potlucks, and family dinners.
How to Store Icebox Cake: Best Practices
One of the best things about this Icebox Cake is how well it stores. It holds up nicely in the fridge, and the texture stays pleasant for several days.
Refrigeration
Keep the cake covered in the refrigerator for up to 3 to 5 days. A tight lid or plastic wrap helps prevent the top from drying out. Since the dessert is meant to be served cold, there is no need to reheat it.
Freezing
You can freeze slices if you want to save some for later. Wrap individual pieces well and store them in an airtight container. Thaw them in the refrigerator before serving so the texture stays smooth.
Reheating
This dessert should not be reheated. Heat will melt the filling and change the texture too much. Instead, serve it straight from the fridge for the best result.
Meal prep considerations
If you are making this for a party or week of treats, slice the cake after it has fully chilled. Store each piece in a separate container if you want easy grab-and-go servings. This works well for students, busy parents, and anyone who likes a sweet dessert ready in the fridge.

FAQs: Frequently Asked Questions About Icebox Cake
Print
Icebox Cake
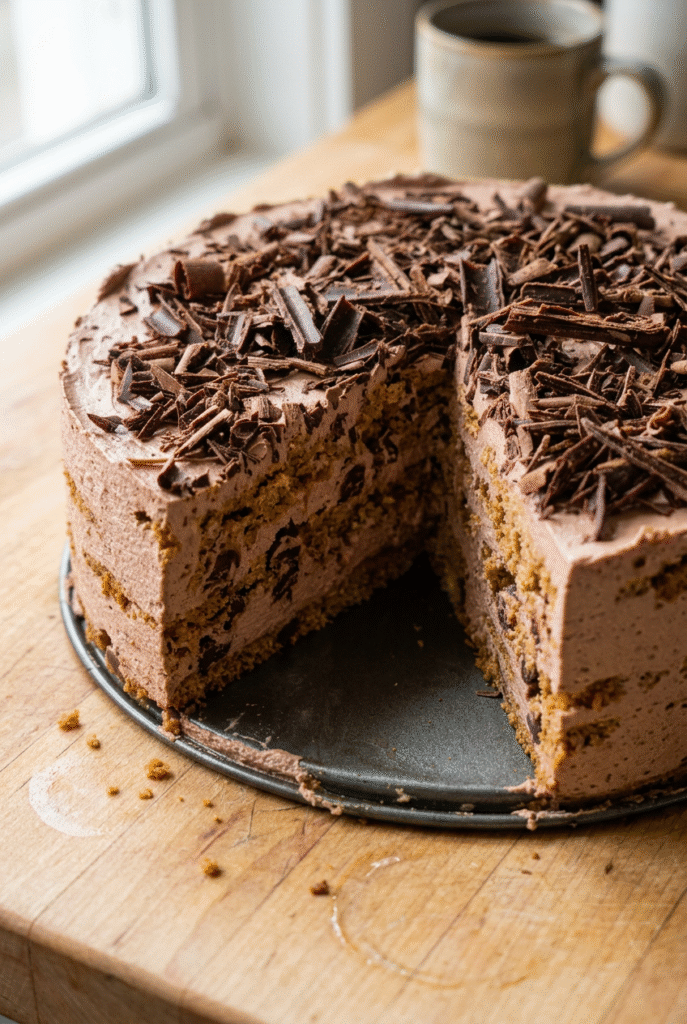
🍫 Indulge in luscious layers of chocolate ganache, whipped cream cheese filling, and softened graham crackers that transform into decadent cake – pure no-bake bliss!
🧊 Effortless prep with make-ahead ease, chills to perfection overnight, serves 9 generously for parties without oven time or stress.
- Total Time: 4 hours 45 minutes
- Yield: 9 servings
Ingredients
– 14.4 oz box chocolate graham crackers for layered base
– 2 cups semisweet chocolate chips for ganache
– 0.75 cups heavy cream for ganache
– 16 oz cream cheese, softened for filling
– 3 cups heavy cream for fluffy filling
– 1.75 cups powdered sugar for filling
– 1 tsp vanilla extract for flavor
– 0.33 cup mini chocolate chips, optional for topping
Instructions
1-First Step: Make the chocolate ganache Place 2 cups semisweet chocolate chips and 0.75 cups heavy cream in a saucepan over medium-low heat. Stir often as the chocolate melts into the cream. Keep stirring until the mixture is smooth and glossy, then remove it from the heat. Let it cool for at least 10 minutes before you use it. This helps keep the cream filling from melting when you drizzle the ganache.
2-Second Step: Whip the cream cheese filling Add 16 oz softened cream cheese to a large mixing bowl and beat it until smooth. This is where an electric mixer really helps, especially if you want a silky filling with no lumps. Next, gradually add half of the 3 cups heavy cream and stir it in. After that, add the remaining heavy cream and beat until the mixture thickens. Now add 1.75 cups powdered sugar and 1 tsp vanilla extract. Beat again until the filling reaches stiff peaks. The texture should be thick, fluffy, and easy to spread. If you want a slightly lighter dessert, you can fold in a little extra whipped cream topping, but the recipe works best as written.
3-Third Step: Set up the pan Use a 9×13 pan for the best layer size. Line up your chocolate graham crackers so they cover the bottom in one even layer. Break a few crackers if needed so the whole pan is covered. The goal is a full base with as few gaps as possible.
4-Fourth Step: Build the layers Spread one-third of the cream mixture over the crackers. Try to smooth it out gently so the filling reaches the corners. Then drizzle one-third of the cooled ganache over the cream. Repeat the layering process two more times. You should end with the last portion of the cream mixture on top, followed by the remaining ganache. If you are using them, sprinkle 0.33 cup mini chocolate chips over the top. They add a nice finish and make the dessert look extra inviting. This step is optional, but it gives the cake a little crunch and a bakery-style look.
5-Final Step: Chill and slice Cover the pan and refrigerate the cake for at least 4 hours. This resting time is important because the crackers soften and the layers set. If you can leave it overnight, even better. Once chilled, cut the cake into 9 slices and serve cold.
Last Step:
Please leave a rating and comment letting us know how you liked this recipe! This helps our business to thrive and continue providing free, high-quality recipes for you.Notes
🔌 Electric mixer ensures perfect whipped cream filling with stiff peaks.
❄️ Chill 4+ hours minimum for crackers to soften into cake texture.
📅 Prepare 3-5 days ahead; flavors improve over time in fridge.
- Prep Time: 45 minutes
- Chilling: 4 hours
- Category: Desserts
- Method: No-Bake
- Cuisine: American
- Diet: Vegetarian
Nutrition
- Serving Size: 1 slice
- Calories: 872 kcal
- Sugar: 43g
- Sodium: 209mg
- Fat: 71g
- Saturated Fat: 42g
- Unsaturated Fat: 29g
- Trans Fat: 0g
- Carbohydrates: 54g
- Fiber: 3g
- Protein: 8g
- Cholesterol: 195mg


