Why You’ll Love These Deviled Brownies
These Deviled Brownies are a fun mashup of two party favorites, and they bring big wow factor with very little fuss. If you need a dessert that looks special for holidays, potlucks, school events, or family get-togethers, this one is a winner.
- Easy to make: Start with a box fudgy brownie mix, then bake the batter in egg-shaped silicone molds. The total time is just 42 minutes, with 20 minutes of prep and 22 minutes of cook time, so you can get these sweet treats on the table fast.
- Great for sharing: The finished brownies are served on a deviled egg tray, which makes them perfect for parties, brunches, Easter tables, and dessert buffets. They look playful and charming without needing complicated decorating skills.
- Rich and satisfying: The fudgy brownie base paired with cream cheese frosting gives these deviled egg brownies a soft, creamy center and a dense chocolate bite. Each serving has 198 calories, 2g protein, and 12g fat, making it a satisfying treat in a reasonable portion.
- Flexible for different needs: You can use homemade frosting or store-bought, tint the frosting with food gel, or swap in a baked sheet and cut shapes if you do not have silicone molds. That makes this recipe friendly for busy parents, students, and last-minute hosts.
These sweet little brownies bring the fun of deviled eggs to dessert time, and they are the kind of treat that gets people smiling before they even take a bite.
If you enjoy playful desserts with a chocolate twist, you may also like our chocolate dessert ideas for more party-ready sweets. For a better understanding of chocolate in a balanced lifestyle, this helpful guide to having a healthy relationship with chocolate is worth a look.
Jump to:
- Why You’ll Love These Deviled Brownies
- Essential Ingredients for Deviled Brownies
- Main Ingredients
- Special Dietary Options
- How to Prepare the Perfect Deviled Brownies: Step-by-Step Guide
- First Step: Prepare the pan and oven
- Second Step: Mix the brownie batter
- Third Step: Fill the molds and bake
- Fourth Step: Shape the center while warm
- Fifth Step: Cool completely
- Sixth Step: Make the frosting
- Seventh Step: Pipe and decorate
- Final Step: Serve and enjoy
- Dietary Substitutions to Customize Your Deviled Brownies
- Protein and Main Component Alternatives
- Vegetable, Sauce, and Seasoning Modifications
- Mastering Deviled Brownies: Advanced Tips and Variations
- Pro cooking techniques
- Flavor variations
- Presentation tips
- Make-ahead options
- How to Store Deviled Brownies: Best Practices
- FAQs: Frequently Asked Questions About Deviled Brownies
- Can I use a box brownie mix for deviled egg brownies?
- How can I make deviled egg brownies without silicone egg molds?
- What piping tip and frosting tips for deviled egg brownies?
- How should I store deviled egg brownies?
- Can I make deviled egg brownies ahead of time?
- Deviled Brownies
- Ingredients
- Instructions
- Last Step:
- Notes
- Nutrition
- Did you make this recipe?
Essential Ingredients for Deviled Brownies
This recipe uses simple ingredients you may already have on hand. For the best shape and texture, stick with a fudgy mix and follow the measurements closely.
Main Ingredients
- 18.3 ounce box fudgy brownie mix – This gives the brownies their rich flavor and dense structure.
- 2 large eggs – These help bind the batter and create a soft, sturdy crumb.
- 2/3 cup vegetable oil – This adds moisture and keeps the brownie base tender.
- 3 tablespoons water – This loosens the batter just enough for easy mixing.
- 8 ounces softened cream cheese – This makes the frosting creamy and smooth.
- 1/2 cup powdered sugar – This sweetens the frosting and helps it pipe well.
- 1 teaspoon vanilla – This adds a warm, classic flavor to the frosting.
- 1 to 2 teaspoons festive sprinkles – These finish the brownies with color and a party look.
Special Dietary Options
- Vegan: Use a plant-based brownie mix, egg replacer, dairy-free cream cheese, and a vegan frosting alternative. Check that the sprinkles are dairy-free and free from confectioner glaze if needed.
- Gluten-free: Choose a gluten-free fudgy brownie mix and confirm that the powdered sugar and sprinkles are certified gluten-free.
- Low-calorie: Use a lighter cream cheese style frosting, reduce the frosting amount slightly, and add a smaller swirl for a lighter treat.
| Ingredient | Purpose | Swap Idea |
|---|---|---|
| Fudgy brownie mix | Creates structure and rich chocolate flavor | Use a gluten-free or homemade fudgy base |
| Cream cheese frosting | Makes the classic deviled egg look | Use whipped or dairy-free frosting |
| Festive sprinkles | Adds color and texture | Try colored sugar or seasonal candy bits |
If you want more baking inspiration, take a look at easy party desserts for every occasion. You can also compare frosting nutrition details with this cream cheese nutrition guide.
How to Prepare the Perfect Deviled Brownies: Step-by-Step Guide
First Step: Prepare the pan and oven
Start by preheating your oven to 350°F. Spray egg-shaped silicone molds with nonstick spray so the brownies release easily after baking. If you do not have silicone molds, you can bake the batter in a parchment-lined 9×13-inch pan and cut the shapes later with an egg-shaped cookie cutter. This recipe is flexible, so it works well for different kitchens and schedules.
Second Step: Mix the brownie batter
Prepare the brownie batter according to the package instructions using the 18.3 ounce box fudgy brownie mix, 2 large eggs, 2/3 cup vegetable oil, and 3 tablespoons water. Stir just until combined. Overmixing can make brownies tougher, so keep the mixing gentle and simple. A fudgy mix is the best choice because it holds the egg shape better than a cakey style.
Third Step: Fill the molds and bake
Spoon the batter into each mold cavity until it is about 3/4 full. This gives the brownies room to rise without spilling over the edges. Bake for about 22 minutes, or until a toothpick inserted in the center shows moist crumbs. You want the brownies cooked through, but still soft enough to stay rich and chewy.
Fourth Step: Shape the center while warm
As soon as the brownies come out of the oven, gently press a small cavity into the center of each one. A rounded spoon handle or the back of a small measuring spoon works well. Doing this while the brownies are warm helps prevent cracking and gives you a neat space for the frosting filling later.
Quick tip: If the brownies cool too much before you make the indentation, the center may crack or break. Shape them while they are still warm for the smoothest result.
Fifth Step: Cool completely
Let the brownies cool completely in the molds before adding frosting. This step matters because warm brownies can melt the frosting and blur the clean deviled egg look. If you are making these ahead for a busy day, you can bake the brownies earlier, cool them, and store them unfrosted until serving time.
Sixth Step: Make the frosting
Beat 8 ounces softened cream cheese, 1/2 cup powdered sugar, and 1 teaspoon vanilla until smooth. If you want a brighter or themed look, add a tiny amount of food gel and mix until the color is even. You can also use store-bought frosting for convenience, especially if you are making a large batch for a party.
Seventh Step: Pipe and decorate
Transfer the frosting to a piping bag fitted with a 1M tip. Pipe the frosting into each cavity in a swirl pattern, just like the filling in classic deviled eggs. Top each brownie with 1 to 2 teaspoons festive sprinkles. The sprinkles add a cheerful finish and help the brownies match holidays, birthdays, Easter brunches, or classroom parties.
Final Step: Serve and enjoy
Arrange the finished brownies on a deviled egg tray for a playful presentation. This little touch makes them feel extra special and is always a fun surprise for guests. The recipe makes a sweet, rich dessert that is easy to serve at gatherings, and the shape alone will have everyone reaching for one.

Dietary Substitutions to Customize Your Deviled Brownies
Protein and Main Component Alternatives
If you want to change the base recipe, there are a few easy paths. For a gluten-free version, use a trusted gluten-free fudgy brownie mix and double-check all other packaged items. If you need a dairy-free version, choose a plant-based cream cheese and use a dairy-free frosting that pipes smoothly.
For egg-free brownies, use your preferred egg replacer in the brownie mix and make sure the substitute works well in baking. If you are working with limited ingredients, a boxed mix is still the fastest route and is often the easiest choice for students, working professionals, and busy parents. You can also bake a homemade fudgy brownie base if you already have a favorite recipe.
Vegetable, Sauce, and Seasoning Modifications
This recipe is all about the frosting look, so the seasoning options are mostly in the sweet finish. Vanilla gives the filling a classic flavor, but you can swap in almond extract or a little peppermint extract for a holiday twist. Food gel can tint the frosting pink, green, blue, or yellow, which is great for themed events.
Sprinkles are another easy place to switch things up. Use pastel sprinkles for spring, red and green for winter, or school colors for a graduation party. If you prefer a lighter finish, use a smaller amount of frosting and only a few sprinkles on top. That way, the brownies still look festive without feeling too heavy.
Mastering Deviled Brownies: Advanced Tips and Variations
Pro cooking techniques
The biggest secret to great Deviled Brownies is using a fudgy mix. A dense brownie holds its shape better and makes cleaner edges when you press in the center. Another helpful trick is to create the indentation while the brownies are still warm, since cooled brownies are more likely to crack. If you are using silicone egg molds, place them on a sturdy baking sheet so they stay level in the oven.
Flavor variations
Want to change the flavor a bit? Stir mini chocolate chips into the brownie batter for extra richness, or add a tiny pinch of espresso powder to deepen the chocolate taste. For the frosting, try a hint of lemon extract, almond extract, or cocoa powder mixed into the cream cheese filling. You can also color the frosting to match birthdays, baby showers, Easter, or school events.
Presentation tips
Presentation goes a long way with these brownies. A deviled egg tray makes them look like a clever party centerpiece, and a light sprinkle finish gives them a polished, cheerful touch. For a more finished look, chill the frosted brownies for about 15 minutes before serving so the swirl firms up. That helps the shape stay neat when guests pick them up.
Make-ahead options
These brownies fit well into busy schedules. You can bake the brownie bases a day or two ahead, then cool and store them unfrosted. If you need even more lead time, freeze the baked brownies before cutting or shaping. On serving day, thaw, fill, frost, and decorate. This works especially well for holiday gatherings, potlucks, and dessert tables where you want dessert ready without last-minute stress.
How to Store Deviled Brownies: Best Practices
Store assembled Deviled Brownies in an airtight container in the fridge for up to 3 days. Because the frosting contains cream cheese, refrigeration keeps the texture and flavor at their best. If you want to serve them later, let them sit at room temperature for 20 to 30 minutes before serving so the brownie base softens a little.
For longer storage, keep the unfrosted brownies in an airtight container at room temperature for 1 to 2 days, or freeze them for up to a month. Thaw frozen brownies overnight in the fridge before hollowing and frosting. If you are meal prepping for a party, it often helps to bake the brownies first, then finish with frosting and sprinkles on the day you plan to serve them. Since they are delicate, these are not the best choice for mailing, but they are wonderful for local events and family gatherings.
| Storage Method | Time | Best For |
|---|---|---|
| Refrigerator | Up to 3 days | Frosted brownies |
| Room temperature | 1 to 2 days | Unfrosted brownies |
| Freezer | Up to 1 month | Make-ahead baking |

FAQs: Frequently Asked Questions About Deviled Brownies
Can I use a box brownie mix for deviled egg brownies?
How can I make deviled egg brownies without silicone egg molds?
What piping tip and frosting tips for deviled egg brownies?
How should I store deviled egg brownies?
Can I make deviled egg brownies ahead of time?

Deviled Brownies
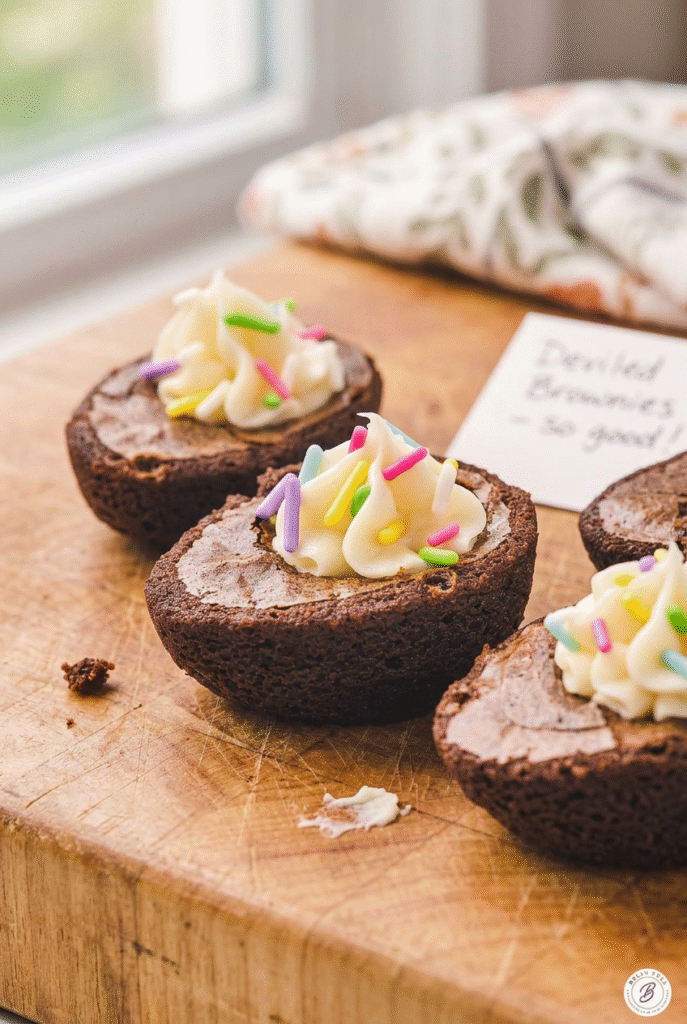
🍫 Rich fudgy brownie ‘eggs’ with creamy frosting ‘yolks’ – playful, chocolate-packed treat that’s irresistibly decadent!
🍳 Fun Easter or party dessert disguised as deviled eggs – easy bake-and-pipe wow factor everyone loves!
- Total Time: 42 minutes
- Yield: 24 brownie eggs
Ingredients
– 18.3 ounce box fudgy brownie mix for rich flavor and dense structure
– 2 large eggs for binding the batter and creating a soft, sturdy crumb
– 2/3 cup vegetable oil for adding moisture and keeping the brownie base tender
– 3 tablespoons water for loosening the batter for easy mixing
– 8 ounces softened cream cheese for making the frosting creamy and smooth
– 1/2 cup powdered sugar for sweetening the frosting and helping it pipe well
– 1 teaspoon vanilla for adding a warm, classic flavor to the frosting
– 1 to 2 teaspoons festive sprinkles for finishing the brownies with color and a party look
Instructions
1-First Step: Prepare the pan and oven Start by preheating your oven to 350°F. Spray egg-shaped silicone molds with nonstick spray so the brownies release easily after baking. If you do not have silicone molds, you can bake the batter in a parchment-lined 9×13-inch pan and cut the shapes later with an egg-shaped cookie cutter. This recipe is flexible, so it works well for different kitchens and schedules.
2-Second Step: Mix the brownie batter Prepare the brownie batter according to the package instructions using the 18.3 ounce box fudgy brownie mix, 2 large eggs, 2/3 cup vegetable oil, and 3 tablespoons water. Stir just until combined. Overmixing can make brownies tougher, so keep the mixing gentle and simple. A fudgy mix is the best choice because it holds the egg shape better than a cakey style.
3-Third Step: Fill the molds and bake Spoon the batter into each mold cavity until it is about 3/4 full. This gives the brownies room to rise without spilling over the edges. Bake for about 22 minutes, or until a toothpick inserted in the center shows moist crumbs. You want the brownies cooked through, but still soft enough to stay rich and chewy.
4-Fourth Step: Shape the center while warm As soon as the brownies come out of the oven, gently press a small cavity into the center of each one. A rounded spoon handle or the back of a small measuring spoon works well. Doing this while the brownies are warm helps prevent cracking and gives you a neat space for the frosting filling later.
5-Fifth Step: Cool completely Let the brownies cool completely in the molds before adding frosting. This step matters because warm brownies can melt the frosting and blur the clean deviled egg look. If you are making these ahead for a busy day, you can bake the brownies earlier, cool them, and store them unfrosted until serving time.
6-Sixth Step: Make the frosting Beat 8 ounces softened cream cheese, 1/2 cup powdered sugar, and 1 teaspoon vanilla until smooth. If you want a brighter or themed look, add a tiny amount of food gel and mix until the color is even. You can also use store-bought frosting for convenience, especially if you are making a large batch for a party.
7-Seventh Step: Pipe and decorate Transfer the frosting to a piping bag fitted with a 1M tip. Pipe the frosting into each cavity in a swirl pattern, just like the filling in classic deviled eggs. Top each brownie with 1 to 2 teaspoons festive sprinkles. The sprinkles add a cheerful finish and help the brownies match holidays, birthdays, Easter brunches, or classroom parties.
8-Final Step: Serve and enjoy Arrange the finished brownies on a deviled egg tray for a playful presentation. This little touch makes them feel extra special and is always a fun surprise for guests. The recipe makes a sweet, rich dessert that is easy to serve at gatherings, and the shape alone will have everyone reaching for one.
Last Step:
Please leave a rating and comment letting us know how you liked this recipe! This helps our business to thrive and continue providing free, high-quality recipes for you.Notes
🍫 Choose fudgy brownie mix for dense texture that holds egg shape perfectly.
❄️ Cool brownies fully before piping to prevent frosting from melting.
🎨 Tint frosting with food gel colors for themed holidays or parties.
- Prep Time: 20 minutes
- Cool: 20 minutes
- Cook Time: 22 minutes
- Category: Desserts
- Method: Baking
- Cuisine: American
- Diet: Vegetarian
Nutrition
- Serving Size: 1 brownie egg
- Calories: 198 kcal
- Sugar: 14g
- Sodium: 99mg
- Fat: 12g
- Saturated Fat: 4g
- Unsaturated Fat: 8g
- Trans Fat: 0.04g
- Carbohydrates: 20g
- Fiber: 1g
- Protein: 2g
- Cholesterol: 25mg


